Showing posts with label home dec sewing. Show all posts

Dressing like my home decor

Monday, 18 October 2021

Earlier this year I bought some vibrant home dec fabric by Kirsten Katz from Spotlight with the intention of making some new cushion covers for my lounge. But the longer the fabric sat on my cutting table the more I wanted to make something wearable from it instead. Which is what I did!


The fabric is a thick, non-stretch cotton so I couldn't make anything that needed any drape or stretch. My favourite pleated a-line skirt is the perfect shape for this fabric.


woman posing in a bright floral skirt


The pattern is from a 2014 Burda Easy magazine that I picked up at a Sydney Spoolettes fabric swap day and I've now made several times. It is really easy to make, it has pockets, it is pleated to give space for movement but isn't too full so there's no danger of flashing anyone on a windy day - all in all, a great pattern.


The back view is cut on the fold which means there's no pesky pattern matching required which was handy for a bold print like this.


The front has a long row of buttons which frankly is the most time consuming part of making this skirt! All those buttons and buttonholes are a bit fiddly and get a bit lost in a busy print like this, but in a plain fabric it would be a nice look.


And the best part is I did have some fabric left over to make some cushion covers, because I made the backs of the cushions from plain black cotton. These are just simple square and rectangle shapes, and I used zippers from the stash so another equally quick and simple project.


There's nothing better than matching your home decor is there? 😂


Necessary, but boring sewing

Friday, 15 March 2013
As much as I don't want to spend my precious child free days doing something boring like cleaning, there's no denying how much can get done when there aren't little people around wanting attention or worse, undoing what you've already done.  But with us planning to sell our house later this year it must be done, so I've decided to dedicate one day a week to clean a room each week.  Ah the joys of being a grown up with responsibilities!

A few weeks ago I decided to organise the bathroom, which I've only just finished because I sort of flagged halfway through and really had to force myself to go on.  It's unbelievable how much clutter can accumulate in such a small bathroom.  I threw out two large garbage bags of empty and nearly empty bottles of toiletries, old and well past it cosmetics and moved some less than fluffy towels into the laundry for dog washing duties. A trip to Ikea and Howards Storage World for some little boxes and containers and a frenzied session with my label maker has mostly corralled all of the bits and pieces in there.  I also managed to incorporate some sewing into the bathroom declutter, although it's just pretty boring but useful.

When we bought our house 10 long years ago now, the bathroom was original meaning it was about 50 years old with the only work done on it comprising a toilet squeezed in sometime in the past to replace the outdoor loo.  It was teeny tiny, literally the length of a bathtub, there was no storage and it looked dirty all the time no matter how much I cleaned it.  And it was all shades of green, with a lovely view of a fence and our neighbour's house through a poky window:


We rearranged some bedroom doors that were adjacent to the bathroom door in a foyer area so we could use the foyer area to make the bathroom bigger, and then we totally gutted the bathroom to come up with this:


One of the best things we did was to build a huge linen cupboard which you can see in the photo above (so that we had enough room to accumulate all that clutter of course!).  My husband built a slide out rack to hang some laundry bags from in the bottom half of the cupboard, all that was needed was for me to sew some laundry bags.  We did that bathroom renovation in 2005 or 2006, and I'm ashamed to admit that I only just sewed those laundry bags today.  I have no reasonable excuse or explanation, just pure procrastination mixed with laziness!  It seriously took me only a couple of hours to make these so I don't know why I didn't make them earlier.

Before: big jumbled mess with mounds of washing, a foot spa and some bath toys shoved in there out of sight.


After: well organised and pretty space, but still the same mounds of washing though!

still haven't removed the price tag stickers off those doors yet either!

They are literally just some square bags sewn from some bleached calico which I happened to have in the stash, and I used iron on transfer paper to put those 'light' and 'dark' labels on the front.  I used some snaps on the tabs that wrap around the pull out timber frame so that I can take the full bag from the bathroom and out to the laundry on wash day (which these days seems like it's every day).

Anna is so interested in the new laundry bags that she is actually going hunting through the house for dirty laundry to put in them, although she does have to check with me on each item which side to put it in.  Her dad is still pretty bad at putting his washing in the correct bag (seriously how hard is it to tell what is light or dark), so I shouldn't be too hard on Anna I guess!

Checking my calendar today I'm quite dismayed to see I only have two weeks before I'm back at work. Time certainly flies when you're having fun, especially so when you're trying to cram lots of things in each day.  Plus my husband has been travelling a bit for work lately so I've been doing some solo parenting which is hugely time consuming not to mention tiring.  He's off this weekend to the F1 Grand Prix in Melbourne for a boys weekend away (well more than that - Thursday to Monday) so I'm planning on getting plenty of me time next weekend to make up for it!

fun times to be sure

Wednesday, 27 July 2011
Thanks for all your fabulous comments on the last dress, I'm pretty impressed myself with how it turned out.  I actually wore it the other day with some black opaque stockings and a cozy black cardigan so I didn't have to wait until summer after all.  I must admit it's a very snug fit because the fabric doesn't have any stretch to it and I've sewn it with very little ease which was necessary to squeeze it out of a metre of fabric cut mainly because I forgot to add some ease since the previous dress I made from the pattern had some stretch to it.  However it is wearable since it's sleeveless (ie no restrictions to arm  movements) and it makes me stand up straight with my stomach sucked in so it's a good dress for improving my posture too! Winner all round.

So I wish I could wow you all with another fantastic dress but instead I've been sewing a skirt.  In grey.  Hmmm, could be a yawn fest but I'll reserve judgement until I've finished it.  What's been keeping me from sewing is the mounds of washing I've been doing lately since Anna decided to start toilet training herself.  I was hoping to wait until summer when it would be warmer, but she has started demanding to use the toilet and taking her nappy off so I chose to go with the flow so to speak.  She hasn't done too badly so far, just a few accidents here and there when she's been too engrossed in what she's been doing to remember to go to the bathroom.  The fun just doesn't stop coming when you have small children does it?

I did sew a few pairs of tracksuit pants during the week for Anna since she needs some clothes that are easy to get on and off.  But they are too boring to share here, so instead I'll show you a little corner of our loungeroom that we recently made over to make into a reading corner.  According to all the design magazines I've read the key to minimising kid mess in your house is to dedicate spaces for them.  So I turned this corner of my loungeroom:


which really was a mess, becoming a depository for things like the Nintendo Wii box and floor fan.  Now it looks like this:


Ahhh, much better and my little bookworm likes to gather her toys around in a circle while she "reads" to them from a book interspersed with yelling at them "are you listening to me?" and "I told you to sit still" - I'm guessing that's something she's picked up from daycare because I am a saintly mother that never ever would say something like that!

The bookshelf is just the Ribba picture ledge from Ikea which is just screwed to the wall and is the perfect depth to hold several books in a display style.  Because I bought the black one (not realising it also came in white), I tried to cover it up with some bunting made from some unused vintage hankies cut into half to make triangles:


Now I feel like part of the 'it' crowd because every second blog out there features bunting of some sort - it's ultra trendy these days and oh so easy to make.

I bought this very cute cane chair from a lady who told me she'd had it since she was a little child, and the chair is at least 50 years old:


It's in great condition given it's age, except the cream colour paint the previous owner had painted it with has started to peel, so I'm thinking about painting it a vibrant colour.  I'll just add that to my to do list.  It is the perfect height for Anna to sit in.

Above the chair I hung this little print in an opshop found frame:


which is a free download available from here from the Feed Your Soul art project which is a very cool site with loads of awesome free prints.

And to up the bunting ante I downloaded some alphabet bunting from Ruffled blog (another free download) to make the word 'read' on the wall - I just love pointing out the obvious!


Finally, I sewed some cushion covers from some brand new still in the packet vintage sheets I picked up at the op shop a few months ago.  These sheets are so gorgeous, and the cotton so thick and smooth (they aren't made like this anymore regardless of thread count) that I was hesitant to cut them up.  But they aren't quite big enough for Anna's single bed since we bought her a very luxurious pillow top mattress - mainly for my comfort since I've spent many nights sleeping in there with her! Plus I figure this way I get to see the fabric rather than have it hidden away on a bed somewhere.  There's heap of fabric left, so no doubt I'll make these into little dresses and pyjama pants and anything else I can think of.


Thank you for letting me share this little tour of my house with you - I tell you sewing home dec items is far more enjoyable when the outcome is so cute!

To answer some questions in the last post:

SewRedHot: Birkenhead Point Spotlight is the closest to my house but I shudder at the thought of going there because it's small, messy, overcrowded and has the worst customer service.  I usually go to the newish store at Lidcombe which is a little bit further away but I can bribe Anna with a stop at the playground at Bicentennial Park on the way home if she behaves while I shop!  I haven't been to Rockdale for ages, but I'm sad to hear it's not the cavern it used to be.

Gail: I did pop into the Lincraft store in the city to check out their sale, but that place was craaazzzy with the line for the counter nearly out the door.  I decided 50% off their mostly horrible fabrics was just not worth queuing for.

Littlebetty: it won't be too long before Spotlight has a 20% off everything sale, I always wait for their sales too since they're so frequent!

conquering my sewing nemesis

Wednesday, 30 June 2010
Thank you all for chiming in with your own experiences regarding your spirited children - it's comforting to know that so many of you have survived parenting the little blighters, but it's amazing just how many of them are out there! Anna has actually calmed down a little this week - going to sleep at 7pm with no tears, and only waking a few times for 30min or so each time. She's also slept really well at daycare, which means she's a happy little girl in the evenings and eats her dinner with no tantrums! If only she was always like this. I did see my doctor about the situation, but while she was sympathetic, she certainly offered no suggestions.

Well this week I have finally finished sewing my living and dining room curtains, achieved only because I've been home sick from work for the last two days with another bout of tonsillitis, this time paired with a head cold and a mouth ulcer to boot. But Anna wasn't sick so she went off to daycare and since I had the house to myself I couldn't waste it by doing something sensible like resting and sleeping all day now could I! Luckily my husband has banished me to our guest bedroom because I'm sick and he's been dealing with Anna at night time, so I've had a relatively good night sleep knocked out on painkillers. See there is a silver lining to practically everything!

These curtains have been a loooong time coming. After a long search for fabric that looks good but was also reasonably priced, I settled on this cotton from Spotlight for the bargain price of $16.95 a metre:


I needed 20 metres plus lining fabric, so some of the beautiful fabrics I saw in the $50 to $150/m price range were definitely out of the question. I made simple 'S wave' curtains, which are the easiest to make and use the least amount of fabric too. All that is basically needed is to hem the curtain and lining fabric on all sides, sew on a stiff header tape, insert a curtain hook about every 10cms and then hang. That's all, no pinch pleating or pulling cord to gather it up, but it still took me a long time to do because a) sewing curtains are boring, and b) handling such large sizes of fabric is a pain in the butt.

Because my living and dining room are so bright, these photos are pretty crappy I'm afraid but here is the big reveal. First the living room:

And the dining room:


And because I tidied up the house today I can show you what is out of frame of my tightly cropped outfit photos:


I had thought long and hard about what to do with the triangle windows at the top, but have decided to leave them uncovered. They are laminated glass so should be energy efficient anyway, and there's no privacy issue or significant glare from them, so that's how they're gonna stay. A lick of paint to the window frames wouldn't go astray though, I guess....

And I would like to say that our living area is finally complete, but there are still a gajillion things left to do: painting window frames and door trim, painting the staircase railing, having a carpenter build a bookshelf, hang some artwork, etc etc.

But I am now free to start sewing what I like best: clothes for me. Stay tuned, I promise to return to your normal programming soon

it's beginning to look a tiny bit like christmas round here

Monday, 7 December 2009
I don't think you all need me to remind you that it's only about 2 weeks until christmas! Yikes, I had so much planned, but like all good plans most of it I won't have time to complete - there's always next year though.....

I have been doing quite a bit lately though, just haven't got any photos because it's been far too hot and sweaty in these parts for a decent photo. My latest obsession is making these felt christmas ornaments from the tutorial over at Zakka Life:

They are super easy to make and although I don't normally like hand sewing it's pretty fun seeing them come to life from a flat pile of felt circles to a round ball. The good thing about them is that they are baby friendly, indeed a few have already seen in the insides of Anna's mouth and came out looking ok. This is my minimalist version of a christmas tree for our house:

I've been picking up twigs from the streets when I'm out walking with Anna so I must look like a right nutbag to anyone passing by! I had intended to paint them white, but I'd say that's one of the things that may get done next year. I put them in a vase wrapped with hessian and secured with red ribbon - too easy. We're generally not home at christmas, going to both sets of in-laws on christmas and boxing days and so have never really made a fuss of christmas decorations before and would you believe we do not own a single strand of tinsel or even a can of fake spray on snow.

I've also been making some little drawstring bags to use for gift bags instead of wrapping paper. I just loosely based their size on the gifts they are to contain, and then sewed some rectangles of curtain fabric overlayed with some colourful fabric. I did it this way because the fabrics I chose were thin cottons and I didn't think they'd be strong enough to survive long term. Aren't they pretty? Although I suspect little kids love the wrapping paper the most so I may be dudding them from some good old fashioned paper wripping up fun.....


And in on going house renovation news the kitchen benchtop is on (after two long days due to our house being old and the walls being very un-straight!), the new cupboards are installed and all that stuff is off my dining table and back into the pantry. Now we're on the search for some new tiles for the splashback, so I'd say we're looking at next year before it's fully finished *sigh*.

I won the Sew Retro contest!

Wednesday, 2 December 2009
Yay for lucky old me, I've scored a $100 gift voucher from ZipZapKap Vintage Sewing Patterns etsy shop for winning the party dress competition over at Sew Retro! I can't believe it, I seriously never win anything except for one time I won $800 at bingo but a little old lady had all the numbers as well so we had to split it :(

Even more unbelievable is that I actually finished my entry on time - there's been quite a few that I attempted but just didn't quite get there in time. Too bad this was randomly drawn, 'cos otherwise I would be talking up my phenomenally exceptional sewing skills.....

But anyway thanks to Anna at Sew Retro for organising the competition, and thanks to Katherine from ZipZapKap for the fantastic prize. I'm having buyers paralysis trying to pick which patterns to buy with the voucher, there are too many to choose from!

Carolyn - don't remind me about going back to work! Now that I've got Anna sleeping regularly in the day and through the night I am enjoying being home and doing crafty type things. But I'll only be working three days a week, so plenty of time to get sewing done as long as I ignore the housework, exercise and my husband!

Miss Sews It All - if I tried to finish all my UFOs before starting anything new there's a very strong chance I would never sew anything new ever again! But to assuage my guilt about the waste I do force myself to finish one every now and then.
Pammie - don't be too jealous of our warm weather, it has been unbelievably hot lately and it's only just the very beginning of summer. Sadly our house needed rewiring if we wanted air conditioning so we just swelter on days that it gets well above 30c degrees (86F).

And thank you to the lovely Eileen who emailed me to say she loves reading about life here in Australia and Anna's capers and hopes that I still have time to blog when I go back to work. Don't worry about that Eileen, I'll probably have more time to blog when I'm back at work, I'd say about three more days LOL!

And since I don't like posting without a picture, have a look at my dining room at the moment and see if you can spot what is wrong with this picture:


Yes that would be my kitchen sink and stove top sitting in what is my pantry cupboard lying sideways on the dining room floor. And yes that is the entire content of my kitchen pantry on the dining table, the contents of other cupboards are strewn throughout the rest of the house! We are having a new stone benchtop and some extra cupboards installed in the kitchen at the moment since we enlarged the kitchen during the recent remodelling of the house. So yeah, add this to the post I did the other day of 'this time last year' because this time last year I was still stupidly optimistic it would all be finished before Anna was born. Ha ha ha silly old me....

But look very closely and you'll see two drops of the curtains that I've been putting off hanging there in the background. They aren't quite finished yet as the hems are just pinned up at the moment, but it's a start!

upcycling: quilt cover + sheet = curtains

Sunday, 9 August 2009
I think that title is misleading because the curtains I made for the guest bedroom just in the nick of time for my in-laws visit look waaaay better than those student houses you see with sheets thrown up over the windows. I've been searching for months for curtain fabrics for the lounge room and bedrooms but nothing has really taken my fancy, and given that huge amounts of fabric are involved with curtains I think you really need to love the fabric before committing to it. But given the short notice for my in laws arrival I had to come up with something, so I turned to my trusty stash. And in fact I'm pretty happy with how they turned out so possibly these may become more permanent than originally intended. Sorry for the bad photo, but even with a fancy camera)that I don't know how to use most of the settings) it was hard to get a good shot with the light coming in through the window:
I had bought a queen sized quilt cover from an op shop some time ago purely because I liked the pattern: a cream fabric with a yellow and brown floral pattern. It was a little bit too short to use for the curtains, and since I wanted some fabric to cover the pelmet I lopped some fabric off the the bottom and sewed on a contrasting panel from a sheet that I happened to have that is a good complementary caramel brown colour. I also had a whole roll of curtain lining and plenty ruffle tape in the stash, both also picked up from op shops over the years which was extremely handy because the only new things I had to buy were the curtain rings and ribbon.

To jazz up the curtains a little to make them look like curtains and not bed linen hanging up, I sewed on a 1in wide yellow ribbon across the join of the contrast panel, toyed with sewing on some buttons but ran of out time so didn't. Don't you love it when those decisions are made for you?


Annoyingly I think the curtains are a little long, but I blame my husband for that because he put up new curtain rod brackets and must have put them on too low, because I made these curtains the same length as the existing sheers that were over the window. I suppose I could re-hem these or get my husband to put the brackets a bit higher - or just ignore it until our next guests come to stay!

Even though the in laws gave short notice to their visit, I'm pretty happy about to see them. My husband has taken the week off so I have a few extra pair of hands to help with the baby and it's almost like a mini holiday for me - now I have some babysitters I'm getting a haircut, a facial and possibly I can even squeeze a massage in. I may even turn up to mothers group on Wednesday without the baby so I'll be able to finish a cup of tea for a change. Plus my mother in law is a whir of activity, cooking, cleaning and making cups of teas so it's been great so far!

So to reply to some comments from the last post:

Marie-Christine - I'm definitely trying to do too much, that is in my nature and I just can't help myself! And I totally agree with you in not doing more than necessary, but this particular pattern was designed to be made as two pieces sewn together so there were no facings and I couldn't be bothered drafting any. Plus with only a few seams it didn't take that much longer to fully line it and using that tutorial is much quicker than the way the pattern called for. But don't worry I look for shortcuts everywhere, in fact if I ever meet the Slapdash Sewist in real life I'll arm wrestle her for the rights to her blog title!

Dawn - I don't know how I manage to do it, but somehow I can twist my arms in all directions and get those buttons done up at the back! Very handy skill really since due to the global financial crisis I had to let go my personal maid who assisted my dressing each morning LOL

Jean - if the day comes that I finish all my UFOs, I'm going to try, try, try to avoid creating new ones but I'm sure it will only be a matter of time. I bet an annoying but cute BWOF will de-rail me.....

Lindsay T - I'm not neglecting my sleep, in fact I feel pretty good these days. Little Anna and I have to a truce of sorts - she sleeps nicely for me usually three times a day, and I let her sleep in my bed for half of the night which she loves. Secretly though I don't mind at all because it means she sleeps in to a decent time in the morning, and she doesn't wake up when she's in our bed like she does in her cot.

Matrosehase - I wish I could claim the blazer I'm wearing in the last photo, but that's actually a skirt suit from Veronika Maine, one of my favourite RTW suits so I'm greatly relieved it still fits

Well with the in-laws around I'm not sure if I'll get any sewing done since I should be visiting with them instead of locking myself away in my sewing room which is what I really want to do. But it's almost like Christmas around here with all the presents and attention Anna is getting (not that she knows what Christmas is yet), so I'll just have to make do with my hair cut and facial and massage.............

stand back, I have a staple gun....

Tuesday, 30 June 2009
Sadly no garment sewing done again this week but I have been drooling over the past few issues of BWOF dreaming, so hopefully soon. I have been doing some more home dec sewing again, but this time it was so quick and simple that I almost didn't have time to get bored with it. Plus there's always fun to be had wherever a staple gun is required....

I had an old footstool liberated from my grandparents but it was covered in cracked green vinyl and my husband was complaining about the amount of "junk" I hoard. So to shut him up, and because I had some of the fuschia chenille fabric left over from my recent chair recovering the solution was obvious:

Now one of my real life friends is going to ask me how to do this when she spies these photos, so here is a step by step for her and anyone else interested. The rest of you more experienced sewers who could do this in their sleep please feel free to move on to a more interesting blog and ooh and ah over their new gorgeous outfit!
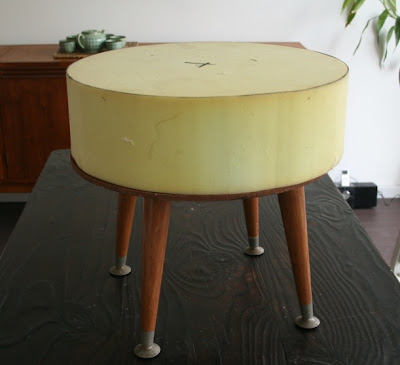
Step One: Firstly pry the old cushion off the stool and let your dog push it around the backyard and tear it to shreds before picking up all the pieces to put in the rubbish bin! And then buy some new foam cut to size. Quietly choke on how expensive foam is.....


Step two: I covered the foam in some polyester wadding, using spray adhesive which works really well but I also roughly sewed the edges down to join them together so I could slide the cover on later without the wadding being pushed down.


Step three: From the fabric I cut out a circle for the top and a rectangle for the sides measuring off the finished dimensions of the foam with the wadding already on because the wadding will make it bigger(remember to add seam allowances and some extra to the rectangle to stretch underneath the footstool). Also I cut out a long narrow rectangle to make some piping.


Step four: Sew the long thin rectangle in half over some cord using a zipper foot to make the piping, and sew the short sides of the other rectangle together.


Step five: Sew the piping to the circle fabric piece, remembering to put the piping on the inside and the seam allowance to the outer of the circle.


Step six: Sew the rectangle to the sides of the circle fabric piece, close as possible to the stitching line of the piping. After sewing, clip the seam allowances every few centimetres to allow it to open up properly.


Step seven: Slide the cover over the foam and hope it fits well. If so continue, if not, put it in a cupboard for a few months until you feel like doing it again. Just kidding! That's how you get a ginormous UFO pile, just ask me! Also try to put all parts of the clipped seam allowances to one side (doesn't matter which just be consistent) because otherwise it will look lumpy, which mine does a bit but I can't be bothered going back to fix it.


Step eight: I used some of the spray adhesive to stick the foam to the top of the footstool and then stretched the sides of the fabric to the underside of the footstool and went staple crazy. I also added a fabric covered button to the top of the footstool since it already had a hole in the centre of the wooden base and was just crying out for it. You can see I used a highly technical device of a matchstick to secure the thread there in the centre, but if you had a button big enough to cover the hole that would probably do a better job.

I used the selvage of the fabric for one side of the rectangle so I didn't have to finish the edge of the fabric or worry about it unravelling, but I may still cover up the edge of the fabric and staples with some duct tape or similar just to make it look neater but it's not really necessary.

For the thread for the button I used four strands, pulled through beeswax to make it stronger, but it's still not that strong so don't pull it too hard! Again I know that from experience. I used a bloody big needle (another technical term) to push it through the foam:

Step nine: All done, turn your footstool over, ignore screaming children and barking dogs for a little while and sit back and put your feet up instead!