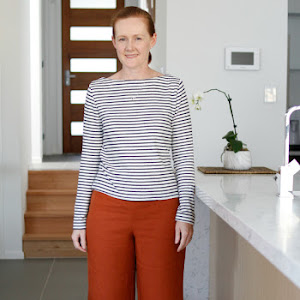
Merry Christmas

Tuesday 24 December 2013
I've done so much sewing and crafting and cooking and cleaning and decorating and socialising in the last week, but of course all of that leaves no time for blogging! But something has to give, and blogging was it which I'm sure you'll understand. I've managed to find a few quiet moments to do a quick post before we start wrapping presents - I have no idea why we've left this to Christmas Eve but at least we do have paper and tape so there won't be any last minute disasters.

So to everyone have a safe, happy and restful or fun (whichever you prefer) holiday time and I'll be back next year with more words of wisdom.


The cute and the not so cute: Japanese sewing pattern vs Burda 6-2011 #111

Tuesday 17 December 2013
After doing that last post on the Japanese sewing pattern books that I own but have not sewn from I felt a pang of guilt not experienced since before I started actually sewing from my Burda magazines! So I traced out a few patterns and decided to make a new dress for Anna. This would be the cute part of the title of this post:


From the Fashionable Clothes for Girls book (ISBN978-4-529-04526-1) I made the tunic dress "a":


image from Tanoshii-Schneidern.blogspot.com
I used size 110 since Anna is 114cm tall now, and the fit is superb although I doubled the length of the bottom part of the dress (almost an extra 15cm long) because this dress was really really short. I think it may be a tunic meant to be worn over tights as shown in the pattern book, but since I wanted Anna to be able to wear this dress during summer I lengthened it so it could be worn as a dress. Of course Anna insisted on wearing tights with the dress for these photos so she could be just like the pictures in the book!


This dress was really simple and straightforward to make, and aside from the length the other change I made was to fully line the bodice instead of sewing on fiddly little facings at the neckline and sleeve openings. The fabric is an Alexander Henry cotton bought from the remnants table at Tessuti Fabrics earlier in the year which has a lovely soft feel to it, and the buttons, ribbon and red cotton faux pocket flaps are all from the stash.


And now to the not so cute. I'm sure you've all had those projects that turn out nothing like how you've pictured it in your head? Well, this is one of those! I saw a picture recently somewhere or other of a pair of shorts in a coral colour with a scalloped edge hem, worn with a black and white top that I thought would look perfect for a summer outfit. Unfortunately I failed to take into account that my legs are not long, toned and tanned so it doesn't look quite the way I wanted it to on me.

I wouldn't normally wear high heels with shorts, it was just for this photo trust me! I think the problem is that I made the shorts a bit longer in the leg because I'm not comfortable wearing them really short and that makes them look a bit dowdy.
 

I used Burda 6/2011 #111 mainly because it was already traced out since I've made it previously in a floral softer fabric. It's a very simple pattern with a side zip and some ridiculously long darts on the front. I left off the patch pockets on the back and instead did a single welt pocket.


For this version I used a piece of cotton drill that has been in the stash for a while so the fit is different but still not so bad.


That back view is far from flattering! How's that for truth in blogging? Anyway I think I'll cut off the scalloped edge and hem it normally and chalk this one up to experience.....

Japanese sewing books

Sunday 8 December 2013
A few posts back, KayC asked if I could recommend any Japanese sewing books which include patterns. I am far from an expert in these - I only own four books and rather shamefacedly I have only sewn one pattern so far. But the good news is that when I pulled them out to do this post I was inspired to trace off three patterns so hopefully I'll increase that tally soon.

I can suggest these blogs as the ultimate source of all things Japanese sewing:

  • www.japanesesewingbooks.com - this site is a fantastic resource for translation of Japanese characters, reviews of Japanese sewing books, links to free patterns and all things Japanese sewing.
  • Japan Couture Addicts - this is a French blog but it has lots of pattern reviews, finished garment photos and photo tutorials which is also extremely helpful.
  • Adelaide Lemonade - this blog also has finished projects and tips for sewing with Japanese patterns.
  • Bags, Crafts and Happiness - has quite a few pattern reviews of girls clothes from a number of books
  • Lollipop Garden Crafts - this blog has both boys and girls patterns
The four books I own are all children's patterns because I find the Japanese aesthetic in childrenswear to be really cute, but the grown up versions are not really my style. I buy my books from the Kinokuniya store in Sydney which has a huge range of crafting and sewing books, but you can get these from Amazon and etsy sellers as well.

The pattern sheets are similar to Burda in that you fold out a large sheet of overlapping pattern pieces and have to trace out the pieces needed for your pattern, adding the required seam allowance as you go. Each pattern has a very concise line drawing of construction order, but some patterns have more detailed photo instructions as well.

The sizing is based on height like Burda and Ottobre kids, and maybe it's because Anna is half Asian but the chest, waist and hip measurement for her height are spot on and the one garment I made her fitted really well.

The patterns in the four books I have are mostly really simple - all of the pants and skirts have elastic waistbands and no zippers; the dresses have buttons but no zippers either; and the jackets seem to be made from knits which are easier to sew as well. I would recommend these books to a beginner sewist because of the simple nature of the patterns, although a basic understanding of the order of construction of garments would be helpful since you can't read the pattern instructions. Finally, an example of pattern instructions that are less helpful than Burda's!

The first book I bought is called "Let's Go Out Girls Clothes" - ISBN978-4-529-04816-3 (searching by ISBN is often the best way), from the charmingly named Heart Warming Life Series:


From this book I made a pair of bubble pocket shorts for Anna way back in December 2010 when she was almost two years old:


The next book I have is called "Fashionable Clothes for Girls" - ISBN978-4-529-04526-1. This one is for heights ranging from 90cm - 130cm and includes patterns for a hat, bag as well as an entire wardrobe of dresses, skirts, tops, jackets, leggings and shorts:


The third one is another one from the Heart Warming Life Series, called "Polka Drops" (I think!) - ISBN978-4-529-04837-8. This one includes some iron on letter transfers to embellish one of the boy shirt patterns. This one is for heights ranging 90cm-130cm:


And the newest addition, courtesy of my husband is "Kids pants and skirts" - ISBN 978-4-529-052229-0. This one is for heights 100cm - 150cm so I still have plenty of time to make things for Anna from it, plus I can use it for Toby in a few years time as well.


So KayC, I hope this was of some help! Unfortunately I can't show you any more finished garments since I've haven't made them, but these books are lovely to look at even if I haven't sewn from them. The mix of fabrics and styling is uber cute, and are a great resource for inspiration.


Spot the difference: Burda 3/2009 #113

Thursday 5 December 2013
When I bought those fabrics a few weeks back from Tessuti I justified it to myself on the basis that I would sew them soonish. I'm trying to sew some smart but casual summer clothes, what I'm jokingly referring to as my 'resort collection', and the striped jersey paired with a simple dress style was a perfect match:
Burda-3-2009-#113-stripe-dress

I used Burda 3/2009 #113, which is a very simple straight dress that has no darts or excessive seams to distract from the stripes, but made into a better dress by the  waistband (which I made with an elastic casing instead of a drawstring):

Burda-3-2009-#113-stripe-dress

I have used this pattern before, but I'll forgive you if you don't remember it because it was quite a while ago, and I looked quite different at the time. Very different, actually. Can you spot the differences?
Burda-3-2009-#113-stripe-dress-maternity-version

That photo was from a post when I was about 6 months pregnant with Toby - I don't remember feeling so big at the time but now that I look at that photo I think whoa! No wonder he was such a big baby when he was born.

Anyway for the maternity version I raised that elasticised waistband to the empire line so that it would sit above the bump, and added extra width to the front of the dress to go around that ginormous bump. It was a fantastic maternity dress too, very comfortable to wear on warm summer days. For this normal version I made the waistband more or less at the waist - I placed it where those black stripes are so that the stitching would be more invisible:

Burda-3-2009-#113-stripe-dress

It sits a bit low but instead it makes the top get a bit of a blousy look, especially at the back, which I don't mind at all.

Burda-3-2009-#113-stripe-dress

The other changes I made were to raise the neckline from a V-neck to bateau neckline, mainly because I prefer that look better and also because I had problems getting the facing for the V-neck to sit properly last time. I cut it a little too wide and my bra straps were showing, so I added a narrow band instead of turning under the edges or making a facing. It seems my Achilles heel is sewing on neckbands in knits, because this one is also a little too wide because it sticks out a bit at the shoulders, but I overlocked it on so it's staying on!

Burda-3-2009-#113-stripe-dress

I also added some bands to the sleeve edge with the stripes running in the opposite direction, purely for looks. The technical drawing for this pattern makes it look like this pattern is a sleeveless dress, but the sleeves actually extend quite far off the shoulder, and adding the bands makes this seem like a dress with sleeves. I managed to achieve a pretty good chevron effect at the shoulders:

Burda-3-2009-#113-stripe-dress

And you'll have to excuse the smug look on my face in the photo below, but I'm heartily gloating internally about exactly matching the stripes along the side seams:

Burda-3-2009-#113-stripe-dress

Unfortunately this pattern doesn't seem to be available for download from the Burdastyle website, but if you happen to have this magazine I can recommend this pattern - it was really quick to sew, very easy and is a nice casual and uncomplicated dress. The stripe jersey fabric (Jade Green Black boardwalk jersey) from Tessuti was also a dream to sew with, the edges didn't curl like some annoying knits do, it pressed beautifully and the seams didn't get wavy at all even though I had run out of fusible interfacing that I normally need to stabilise them. And the fabric wore really well - I took these photos in the afternoon after wearing the dress all day and there are hardly any wrinkles.

Overall I'm really happy with this dress, it's a perfect Christmas day dress I think - light and breezy enough for a day that's bound to be really hot, and an elasticised waistband to cater for too much food!

Burda of the month: 11/2013 #103 Back keyhole blouse (and Burda of the month replay!)

Sunday 1 December 2013
I finished my November Burda project yesterday, so despite Burda not sending me the magazine until the 20th of the November I still managed to get it done in the same month! Big pat on the back for me. Thanks to my husband taking the kids out to see a Hi-5 concert and shopping in Chatswood on a Saturday afternoon (those who know Hi-5 and Chatswood will know that it was more than suitable compensation for all the client dinners he had last week!) I managed to get not one, but two garments started and finished in the same day.

Of course it helped that I chose a rather simple top to sew this month. I must admit that I struggled to pick a project this month, because after reading some rave reviews of this issue when it arrived I was a bit blah about the patterns. Some were ok (narrow pants, raglan sleeved dress, panelled dress etc) but since I had made similar type garments in recent months I decided to go out on a limb and sew something quite different to my usual style. I made the pleated neck, voluminous sleeve and shapeless top, 11/2013 #103:


And actually I don't mind it even though it's not my usual overly fitted style. I made a few small changes to make this more summer friendly - the fabric I used is a thin cotton voile from the stash in a small navy blue and red floral, and I made the sleeves elbow length instead of full length. This way it's still light and breezy enough to wear during summer but has good coverage for keeping my fair skin out of the sun. I probably should have either made the sleeves slightly longer or slightly shorter, because the narrow cuffs tend to get pulled up into my elbow bend and the result is that super puffy sleeve you can see above!

The back has a keyhole opening and two pleats at the neckline too. A word of warning to anyone planning to make this - the neck opening is really tight and probably needs widening to make it easier to get on and off and for more comfortable wear. I ended up sewing on a long loop from hat elastic so that neck opening sits wider open at the back so that I don't spend the day feeling strangled:


And the other tip I have for anyone making this is to trace the sewing line of the shoulder dart properly otherwise you'll end up with really pointy shoulders. Because I added my usual 1.5cm seam allowance when I traced the pattern and just sewed according to the cut edge, my darts ended too abruptly and needed rounding off:


And when I checked the pattern I could see the fault was all mine - I should have traced the curved sewing line from the pattern rather than charging on in my usual style!


But overall I quite like this pattern, I can see it made up in a soft, draping fabric like washed silk with full length sleeves for winter. And the bonus is that it only took me about two hours from cutting out to finishing, although admittedly I had already traced the pattern during the week which is the most fiddly, boring part of sewing with Burda.

But wait, there's more! I was worried that I wouldn't have anything to wear this with so I decided to make a new pair of simple, black shorts to wear with it. It turns out that this top looks good with jeans and my denim skirt so I need not have worried but I needed a new pair of shorts anyway, so no harm done. I used Burda 10/2013 #127 which was my Burda of the month project from last month:


I sewed this pair from a stretch cotton drill that I bought on Saturday morning when I popped into Spotlight to get a zipper. In fact by the time I started sewing these shorts the fabric was still a little damp from prewashing - how's that for stash avoidance! It's been quite a while since I bought some fabric specifically for a project, but unbelievably I didn't have any stretch black cotton in my stash.
The last pair I made from this pattern was from a cotton linen blend that didn't have any stretch (although it did bag out) but was quite soft, and it's amazing how different the garment fits being made in a stiffer, stretch fabric. This version sits higher on the waist because the fabric doesn't slouch down, the pockets stick out a bit at the sides and I had to take in the centre back seam a lot more because it was gaping at the back. I got a decent fit at the back I think, if you can ignore the VPL (sorry, it's not a good look is it?) and the gaping side pocket.


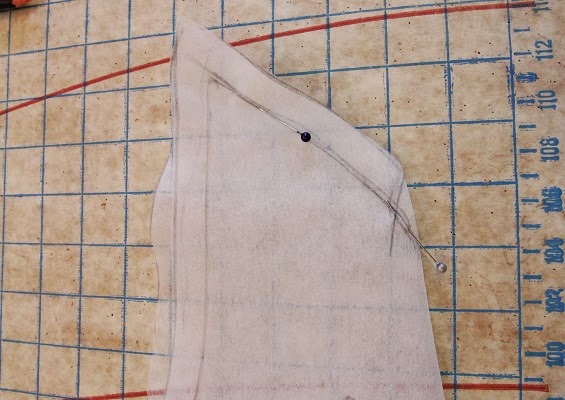
The other changes I made to the pattern (besides cutting it off a knee length of course) was to sew two welt pockets at the back just to break up that expanse of fabric - I've read somewhere that well placed pockets can make your derriere look smaller and more shapely than not having any. The other change I also made was to cut out the pattern with a fly extension like this:


instead of sewing on a separate fly extension. It just cut out a few steps and simplified matters. I also ignored Burda's instructions completely this time for installing the zipper because I recall being thoroughly confused by them last month, and instead used Sandra Betzina's super simple and effective method, seen in this Threads video.

So happily I've got a 100% success rate when it comes to sewing from my Burda mags this year - but if Burda waits until a few days before Christmas to send me the December issue I doubt I'll be able to pull off another swift project like this one.