Spring Cleaning

Thursday 29 November 2012

Given that this Saturday is the 1st of December and the start of summer, it's a bit late for a post titled 'spring cleaning'.  But seriously, it has taken me that long to get it all done! And I don't usually go in for the one big spring clean of the year, I prefer to clean when necessary (which with two kids seems to be all the time) but this year one thing led to another.  I had to clean the curtains in our living and dining room because Anna spilt some chocolate milk all over them while jumping on the lounge with a bottle in her hand, and then when the curtains were down I noticed how dirty the windows were.  So I cleaned the windows which took ages since we have a wall of louvred windows which means many, many panes of glass plus a massive sliding glass door.  And then when the windows were sparkling clean I noticed how dusty everything in the room was.......

And as I said in the last post, since we've decided to sell our house next spring I've been on a massive decluttering phase made easier by clearing out my husband's stuff when he's not home! He is such a hoarder - I know I have lots of stuff but at least it's properly stored and I'm (slowly) using it, but he has been hanging on to ratty college t-shirts that are 20 years old, heaps of cricket gear even though he hasn't played for years and several sets of golf clubs even though he only uses the newest ones.

So while he was at work I threw out a big pile of ratty clothes, donated a big bag of decent clothes and when he came home he even thanked me for cleaning up his wardrobe but didn't notice that he had half the amount of clothes he had previously! In fact he even joined in by culling a few suits and a stack of business shirts that we plan to donate to an organisation that assists men trying to get back into the workforce.

I decided to hang onto a few of his business shirts that were too worn around the collar and cuffs but were otherwise quality fabric (my husband loves his designer labels), so that I could refashion them.  So from one of his business shirts that is a thick cotton with a fine blue stripe I made two pairs of shorts for Toby, kept the buttons and chucked the scraps into the bin.


I used Ottobre 3/2009 #14 for one pair, but I found them to be a little too short and too wide legged for my liking.  For the other pair I used McCalls 6016 which I modified the pattern by lowering the waistline, narrowing and lengthening the leg - it is such a big sized pattern for the size marked on the envelope that I almost wonder if the envelope is a misprint.  But anyway I've now made myself a TNT pattern for Toby's shorts that I will use over and over again, because let's face it what else is there to make for little boys?

From my big box of UFOs and wadders, I turned a pair of unfinished shorts I started for myself that failed in the making because they were too tight into another pair of shorts for Toby.  Again using the McCalls pattern all I did was add patch pockets to the back cut on the bias for a bit of interest:

black gingham shorts

Also from my box of clothes to be refashioned, I remade a stretch linen skirt in navy I made pre-blogging days and have washed and worn far too many times:


Big sister Anna wasn't to be left out (not without loud protest anyway).  For her I refashioned a strapless shirred dress that someone gave to me that I've never worn because I don't have the necessary assets to keep a strapless dress up, but it is such a soft cotton with a cutesy cotton lace border that it suits a little girls dress better anyway.  All I did was to chop off 20cm from the bottom and use that to make cap sleeves with a ruffle, and take it in about 10cm down the sides:


Unfortunately all this sewing activity has made little noticeable difference to the amount of stuff in my sewing room and hasn't reduced my stash any, but I just can't bear to waste textiles knowing how energy is embodied in each piece, even the crappy bits.  So to get a bit more wear out of some fabric in a different way makes me happy!

Sydney sewists meet up success!

Monday 26 November 2012
Thanks to everyone who came along on Saturday - I had a fantastic time and it was wonderful to meet you all in the flesh.  I have to admit to feeling a bit nervous beforehand, sort of like when you organise a party and worry what if no one turns up? Or what if people come and just stand around not talking to each other? But I need not have worried because not only did quite a group of us turn up (and found each other instantly in Tessuti's!) I don't think we all stopped talking the entire time!  In fact we had such a good time we're planning another in February next year, so to all those who couldn't make it this time I look forward to you coming to the next one.

Like Christy over at Little Betty I spent a fair bit of time trying to decide what to wear beforehand.  It had to be self made of course but since that's the majority of my wardrobe that's easy, and I wanted a dress since I didn't need to consider functionality given I was going to be sans kids.  In the end though Toby helped me decide - just as I was leaving and I handed him over to his dad he decided to deposit his lunch all down my front, so I had to change out of the black and yellow print Burda sundress from a few posts ago, to a simple sheath dress I made pre-pregnancy from some cotton bought at Tessuti's a while back from New Look 6968:

New Look 6968

I was very relieved to still be able to fit into it although it was a little snug, although I could do without the bruises on my legs as accessories.  The wonderful Colette at Tessuti's recognised the fabric straight away, even though it was from a few years ago.  And speaking of Colette, she very generously gave our group a nice discount on our purchases, so I think most of us walked out with a carrier bag (some larger than others!).

I however was very restrained on the day, only buying three pieces.  You see we're planning to sell our house next year and I'm becoming acutely aware of how much stuff we have, not just in my sewing room but in our entire house.   The thought of packing up my house, my sewing room and my ginormous stash is in my mind every time I'm out shopping so I'm trying to stop buying so much stuff!  And to make it worse we're planning on building a new house and so in the intervening time we'll probably be living in a two bedroom apartment we own nearby.  Crazy I know, especially since we have two kids now, but it's to save some $$ during building, so my beloved stash will be in storage for some time and I'll have to be quite disciplined in project planning during that time.

But with a discount on offer at Tessuti's I couldn't resist, and I bought a gorgeous Liberty print cotton to make a nice shirt, and some blueberry ponti to make a dress of some sort for when I'm back at work next March:


And from The Fabric Store I picked up a cotton print that I plan to make a shirt style dress from:

The Fabric Store

So thank you to all the ladies that came along, it was wonderful meeting you all in real life.

P.S Therese, can you please email me your email address so I can get back to you on those measurements you want - I can't see an email address on your blog or your blogger profile.  Thanks!

Burda of the Month: 11/2012 #124 (and Vogue 2659 for good measure)

Tuesday 20 November 2012

I'm so excited y'all! Sorry, I've been watching far too much Dr Phil since I've been on maternity leave and way too many Dr Phil-isms have pervaded my everyday language.....

I'm not so excited about the latest project, sure it's a rather nice skirt but it's just an a-line skirt afterall, but I am more excited about the fact that I've made something from the November issue IN the actual month of November!  In the same year too! It's only taken the best part of the year, but it means I've fulfilled my challenge to sew something from each issue of Burda in the month I receive it, from fabric already in the stash. I'm so proud of myself 'cos usually I'm severely lacking in willpower to keep up with little challenges I set myself.

Ok, enough chest beating on my part.  The latest Burda project was so easy it was almost cheating on my challenge, but after all those lovely but thoroughly impractical dresses I thought it was about time I sewed something that I need right now to fit in with my current lifestyle.  An a-line skirt with pockets and a touch of topstitching is just what I need to hang out at the playground this summer, so I chose #124 which looks like this:

Burda 11/2012 #124


The magazine recommends wool for this pattern which I think would be lovely for a winter garment, although I'm not too sure about that bright orange with the teal blue stockings.  Since it's summer around here I decided something more lightweight was needed, and I had a piece of brilliant emerald green cotton drill sitting in the stash for sometime that was perfect for this project.  It was an opshop purchase ages ago, so there wasn't alot of length, but there was just enough for this skirt with only tiny scraps leftover that went in the bin and not the scrap bag so I'm happy about that too!

Burda 11/2012 #124

There's not much to say about the construction of an a-line skirt really, it was a really quick sew and the only time consuming bit was making those welt pockets on the front.  For some reason I can do double welt pockets easily, but single welt pockets perplex me a little.  I practised on some scrap fabric first, and the final version turned out really well.  As usual the Burda instructions were very difficult to understand, so I turned to David Coffin's "Making Trousers for Men & Women" but these are either written in a highly technical manner or I'm just too tired at the moment but it took a while for it to click for me.  Of course, after I had finished this skirt I discovered this tutorial for a single welt pocket over at seamstress: poppykettle which is far more comprehensive and easy to understand than the books and other tutorials I have read.  What was that rant I had about tutorials a few posts back? Ok, maybe I was very wrong.....

Burda 11/2012 #124

And now that I have another look at the pattern picture that I just posted up there I notice it was meant to be double welt pockets anyway!  Oh well, the skirt still looks pretty good in a single welt pocket, but I do think they are too widely spaced on me because the welts sort of jut out because they are sitting on my hip bone.  If I make this again I would probably bring them a little bit closer to the front so they sit flatter.

Burda 11/2012 #124

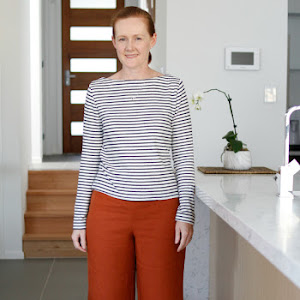
So when I first made this I intended to wear it with a black and white stripe tshirt that I already had, but it was stretched out and looked terrible.  But instead of dashing off to the shops to find a replacement tee, I instead went to Spotlight and bought some black and white stripe ponti on the last day of their 30% off fabric sale, and made a boat neck tee from Vogue 2659, which is an OOP pattern from 2002:


Again, such a simple t-shirt doesn't require much description of it's construction method, but I did make one change to the order of construction - instead of sewing the facing onto the finished garment in a ring, I sewed the facings on to the back and front pieces while they were still separate, and then sewed the front to the back with the shoulder seam and facing seam in one long seam.  I saw this on someone else's blog (sorry have forgotten who otherwise would have given credit) and it's a really good tip - I think the facing sits flatter this way.  Ordinarily I would have just ironed on some seam stabiliser and turned the seam allowance under and stitch, but I didn't want any visible top stitching around the neckline on this one, which is why I went with the facings instead.

Normally I use Burda 2/2009 #108 for my go to pattern for a boat neck top which I've made several times with success, but I couldn't find it in the mess that is my sewing room so decided to go with this Vogue pattern instead of retracing (anything to avoid tracing!).  I think the Vogue looks ok, it could probably be taken in a bit at the sides and I think the neckline sits a little too high on me, but for about $10 worth of fabric and about an hour and half of sewing I've got myself a much better quality top than I could've bought for that price and in that time frame.

Vogue 2659

And it turns out that a bright green skirt is more versatile than you'd think.  Aside from my black and white top and the rather predictable pairing with white, black or grey, I found colour inspiration in a K-mart catalogue of all places to wear a bright floral with it.


I'm pretty sure I could find some suitable fabrics in my fabric stash to make some cute tops to wear with the skirt (no offence Kmart but I shan't be buying your polyester made in China clothes), if not I can always buy something this Saturday at the Sydney sewists meet up.  It's my birthday tomorrow so I'm giving myself permission to buy a birthday present (or three!)

And for those who sadly can't make it this weekend, never fear I'm sure we'll have another one soon!

Reminder: Sydney sewing obessives meet up!

Monday 19 November 2012
Ok, clearly I need more sleep because I was being as clear as mud in the last post about the Sydney sewing fans meet up this Saturday coming.  It is on the 24th November, and not the 17th as I wrote in the last post (well spotted Debbie Cook!).   My husband accused me of deliberately mixing the dates up so I could get two free Saturdays in a row (and what would be wrong with that I asked him?), but no just me getting things mixed up.  This is why I use an old fashioned Filofax to keep my life in order.....

And if you're looking for this pattern over at the Burda Style website:


so you can make a pretty dress too like I did a few posts ago, the pattern number is actually #118A of issue 10/2012, not #108 as I wrote in the post.  In fact here's the link to the downloadable pattern if you don't have that issue.  Sorry to Almeda and anyone else that I sent off on a wild goose chase!

But on the upside, I'm so glad you're all paying so much attention to what I have to say!

Suck it up, baby!

Saturday 17 November 2012
I'm glad so many of you agreed with my little rant on the unnecessary repetition of tutorials and it wasn't just me! Although ReadyThreadSew did make a good point - sometimes you do need to read many tutorials before you find the one that clicks for you, so in that regard I suppose it's good there are many out there.  And one of the best thing about the internet is that if you find something that annoys or offends you, just click away.  Or better yet turn off your computer and go outside for some fresh air - something I should do more often!

Anyway, one of Toby's emerging teeth have finally popped through, so he's calmed down and we're having what I imagine is going to be a brief reprieve until the next one comes out.  But the dribble! Still with the dribble by the bucket loads.  The poor little thing had quite a red chin rash which is not a good look, so I decided to pause in my selfish sewing and make him some dribble bibs, also known as bandanna bibs.  For those of you that don't have kids and aren't closely acquainted with baby dribble they are simply triangle bibs that are smaller than regular ones because their sole purpose is to keep the neck and clothes of said baby dry.

I found a really cute sheep print in Spotlight's nursery knits line, which is a cotton knit and just right when backed with some terry towelling from some nappy squares I have loads of but use for other things than nappies since I use modern cloth nappies.  Actually Raewyn if you're still reading, thanks again for the nappies and the Little Squirt hose you gave me when I was preggers with Anna - they are still being used in our house and have proved to be a very useful gift.

bandanna bib


So after my rant about unnecessary tutorials, I wouldn't dare offer one for making these! Really, it's just two triangles sewn together with a couple of snaps on the end, so a tutorial really isn't necessary, but if you don't have ready access to a child and would like to make some of these (I think they would be a really good gift along with the standard burp cloth and receiving blanket) here are the dimensions I used:
bandanna bib


The dimensions I used (it it's not clear above: 40cm for the long edge around the neck, 27cm long for the other two sides and a height of 17cm from the point to the neck edge) fit a chubby 8 month old with some extra room so it should fit for some time yet to come.

If you wanted to get really fancy, The Purl Bee has a tutorial for a fancy schmancy double layer bandanna bibs that are really pretty.  I however prefer to keep these things quick and simple, given they are destined to become grubby and be discarded eventually.  And doesn't Toby look pretty happy with his?
bandanna bib

bandanna bib

Just a reminder to anyone in Sydney that sews, blogs, or just reads blogs about sewing that we're having a meet up next Saturday (17 Nov edit: 24 Nov), kicking off at 12.30pm at Tessuti's Surry Hills store.  I got a little too excited about it and thought it was on today - I realised it just after my husband went out with the two kids on his own for the first time, so I had quite the productive and peaceful afternoon.  My husband was a bit tired when he got home, but after 8 months it was about time I think!

Sewing Burda for Others: ooh er scary! 10/2008 #113

Wednesday 14 November 2012
Thanks for all your lovely comments on the pink dress - I haven't put it away in the wardrobe yet, instead leaving it to hang on my bedroom door so I can admire it's colourfulness!  Gail, you're right that it's not nursing friendly, and nor do I really have any occasion to wear it at the moment since I'm not back at work until next March so it's really an aspirational dress rather than one I can wear right now.  Nothing wrong with sewing a pretty dress for no real reason is there? And MareeAllison, you crack me up liking the muslin best - you don't happen to want the rest of that fabric do you?

So has everyone realised that Christmas is just around the corner? I haven't even started Christmas shopping and I'm already feeling shopping fatigued - there are just so many birthdays in my circle of family and friends in October, November and December that it's challenging enough to get through them all before starting again on Christmas presents.

For my mum's birthday a few weeks ago I bought her a vibrant blue linen blazer and matching necklace  from Sussan's to brighten up her wardrobe since I'm on a colour crusade for myself and am dragging everyone else along too. I didn't want the blazer to be an orphan in her wardrobe though, so I decided to make her a shirt to go with it too.

Now sewing Burda for yourself can be difficult enough since you need exact measurements and to really work on fitting the garment to get the best look, but when you're doing this as a surprise and only getting an idea for size by peeking at the labels of clothes on the clothesline it's even more difficult! So I decided to pick a fairly simple style that didn't require a close fitting and could be easily altered if needed.  Digging deep in to my magazine archives, I found this raglan sleeved blouse #113B from the 10/2008 issue:


Instead of the glamorous sating pictured in the magazine, I chose a thin cotton that is more appropriate for our summer weather which has been a long standing resident from the stash, which has a woven stripe through it as well as a floral print.  I think this fabric is lovely, I don't know I haven't used this fabric before, but I think it is perfect to go with the jacket:


Annoyingly I didn't pay enough attention when cutting this out to avoid the dreaded 'bullseye' effect of the flowers on the front, but I'm hoping that those flowers on the centre front at bust level are off centre enough and clustered enough not to cause it.

I'm telling you, the most time consuming part of sewing something after cutting out must be the fitting because I managed to sew this up in about 2 hours.  And thankfully it fit pretty well, all it needed was to let the darts out a little.  The funny thing is that the jacket didn't fit though - luckily that can be easily returned and I didn't spend hours sewing it!   And here's my mum, grimacing through her pose (first time appearance on this blog I think?):
 
Don't worry I trimmed that wayward thread on the hem after taking this photo!
And with the leftover fabric I made myself one of those nifty infinity scarves, so none of this fabric made it back into the stash or scraps pile.  Bonus!


I'm not going to bore you with a tutorial for the infinity scarf - there are already billions of them out there and it's just a strip of fabric sewn into a tube.  In fact it's one of my pet hates arising from all the crafty blogs I read - people who do a detailed tutorial for every thing they make, whether it's super simple and not necessary (ooh face washers made from a towel: cut towel into squares), or they've been sewing for about 3 milliseconds and what they made might be exciting to them but is really ordinary/borderline crap, or if there are already millions  of tutorials for that out there already.

Ooh sorry for veering off into crankyville there, Toby is cutting some teeth and I'm a little sleep deprived these days!

Burda of the month: 10/2012 #118 - the surprising choice

Wednesday 7 November 2012
Once again thank you all for chiming in on what fabric to use for the dress for my latest Burda project (10/2012 #118)  - so many compelling arguments for going with the plaid, a solid or a print! I think I'll have to do what Allison C suggested and make a few of them because it is such a good pattern.  I did have a chuckle at the suggestion that the muslin should become the final version - whilst it may have looked ok in the photos the print is not really to my liking.  I think my mother in law gave me that fabric and there is heaps of it too, so I was glad to use some of it up. 


The Vivienne Westwood bias plaid dresses that Trumbelina and lsaspacey helpfully linked to are exactly the look I was picturing in my mind, so I think the plaid would (probably) look really good, if I could get over my obsession with exactly matching the stripes at the side seams.  However I decided against using the plaid fabric not because I was worried about wasting the fabric if it didn't turn out well, but because it's more of a winter fabric and needs lining since it's a soft brushed cotton (ie a bit clingy). We're heading into summer here and I couldn't bring myself to sweat (literally) over a dress I wouldn't wear for another 6 months.

So then I tried to find a solid in my stash because I agreed with those of you that pointed out that a solid would be the best to show the side gathering detail of the dress.  But unbelievably, despite the hugeness of my stash the only solids I really have are either winter weight fabrics or were too stiff for the drapiness required for the cowl.  I did have some black ponti in the stash, but I"m trying really hard for colour these days so I passed on that.

Anyway, while I was digging through the stash I came across a cotton sateen buried way in the back, that is a deep pink with a print that looks at first glance to be thimbles and stitches (gotta love a sewing themed fabric!).  I don't think I own a dress in a dark pink, in fact I don't think I own many (or any?) clothes in pink, so it is a surprising choice for me but it just seemed right:


And here's my finished version:


I still can't believe that I didn't need to make any changes to the pattern to get this to fit, aside from my usual grading out from one size to another at the hips to fit my pear shape.  This fabric has only a slight amount of stretch to it, but enough to make wearing this comfortable enough whilst still fitting remarkably well.

Because the fabric is a non directional print I was going to cut it out following the suggested grain lines of the pattern, but my fabric wasn't wide enough to do that.  This fabric is only 90cm wide, so I had to cut it out with the straight grain for the skirt part and the bias grainline for the cowl.  But the fabric was soft enough for the cowl to drape much better than the practice version without having to deepen it or change the shape of the cowl.  I did wonder if I would need to sew the cowl down to one side, like #117 which is the shortened top version of the dress (as an aside, is there really a need for another pattern when it's just shortened with longer sleeves?), but it seems to sit well enough in this fabric:


The only changes I did make to the pattern were deliberate: I added a vent at the centre back seam for walking ease beause I tend to walk really really fast, even in heels, so I need a bit of space to allow for a good stride.  It seemed strange to me that such a fitted dress would not have one, but since it has a centre back seam it wasn't difficult to add one in.


The other change I made was to make a cap sleeve instead of the three quarter sleeves, using the sleeve piece from the dress from September's Burda challenge which just happened to be still on the cutting table (laziness does pay off sometimes!).  I do love a three quarter sleeve, I think it looks very graceful and flattering, but again this is a summer dress, and a Sydney summer is usually really hot so a cap sleeve was a more practical choice.

So onwards to the November Burda challenge garment - this might just be the month that I fulfil the part of my challenge where I sew something from the magazine in the month of its issue!