Old habits die hard

Tuesday 28 June 2011
Thank you all for the suggestions on what to wear with the blue dress - I think I need to set aside a day for some dress up time to see what I have in the wardrobe that could work, but I realise now that I do have many options.  There is no formal dress code at my work, only the one I set for myself because I find it easier and quicker each day just to put on a matching suit each morning, but perhaps I should be more creative in what I wear.  Either way I don't think that the orphan dress will be without a partner(s) for long.

I don't want to harp on about my new overlocker too much because I'm sure you'll all got the message of how much I love it so I'll try to make this my very last reference to it.  Because it was such a pain to change threads in my old overlocker I used to decide on my sewing projects based on what colour thread was in the machine, and as a result used to do many projects in a row in the same colour.  Well I guess old habits are slow to die because after making my blue dress I decided to knock out one more quick project in blue before changing threads for another project.  Totally unnecessary now of course since it takes mere minutes to change threads, but it's a cute dress so I'm glad I did.

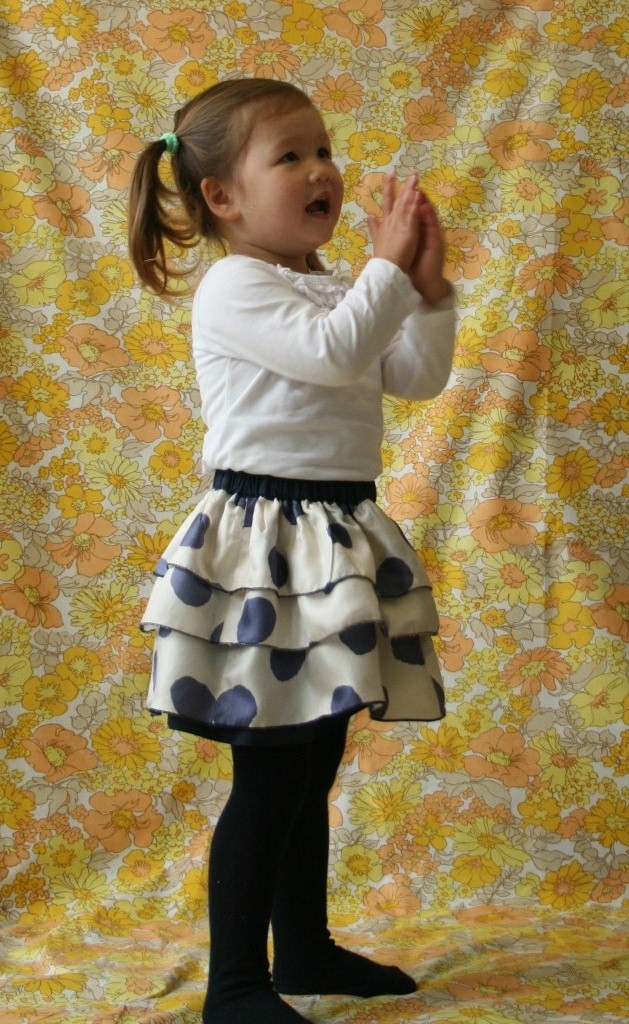
This project started life as a dress given to me by a friend who has a naughty habit of buying things without trying them on and not always bothering to return them either (yes Catherine, I'm talking about you!).  Anyway she gave me a bag of clothes that she thought I could wear or make something out of since the fabrics were quite nice, including this stretch denim dress:


When I tried this dress on the short length, the pleated empire line and the sheer shoulders reminded me of this:
source
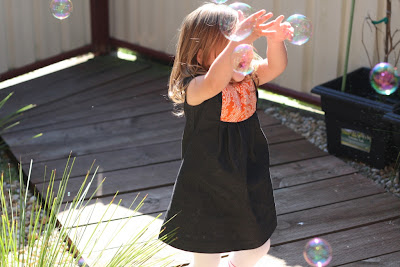
Not a very good look at all! At first I was just going to take off the bodice and make it a pleated high waisted skirt but I already have two denim skirts so instead I took it completely apart and made this dress for Anna:


It's Simplicity 2320, the cap sleeved version of the grey corduroy dress with the red flowers I posted here.  The orange fabric is some cotton paisley print from the stash, and I reused the zipper from the original dress so overall this dress cost me nothing at all except for an hour and a half of my time. 

I'm really impressed with this pattern - it's quite simple to make, isn't an overly fussy nor too simplistic style and it's possible to achieve a very different look depending on choice of fabrics.  I can see a few more versions of this dress in Anna's wardrobe before she grows out of the size.

This dress was perfect for the sunny winter Saturday we just had to chase some bubbles:


For having a cup of tea:


And for munching on a matching orange lollipop:

Blue dress, blue skin

Saturday 25 June 2011
It's becoming harder and harder to drag myself away from lazing in my nice warm lounge room and head into my sewing room which probably explains why it took me a bit over two weeks to finish my latest dress. Instead I've been living vicariously through all of your blogs, especially those of you who have been sewing up pretty summer dresses - isn't it amazing how the prospect of warmth and sunshine gets our motivation going?

I too have made a nice sleeveless summer dress which is a little bit crazy since it's so cold around here, and will be for the next 2 or 3 months, but hey sewing on a whim is the best kind of think.  I sewed dress 130 from BWOF 2008-12, which is the exclusive design for that month's issue:

 The fabric suggestion for the bodice is for chiffon or like fabrics, which is typical outrageous Burda because even though the bodice is gathered it is also unlined, and I seriously doubt whether those gathers would give enough coverage for decency's sake! Plus the pattern as designed uses self fabric for bias binding around the neckline and armhole, which to me seems really fiddly and I would not have had the patience to do.  Instead I opted to make mine from a thin polished cotton in a navy blue diamond shape dot pattern for the bodice, a wool gabardine in navy blue for the skirt and fully lined the top and bottom with Bemberg lining.  All fabrics from the stash too which is a nice bonus.


I found the fit on this dress to be absolutely perfect with hardly any alterations, which is a relief because I threw caution to the wind and didn't bother with a muslin.  I cut a size 34 for the bodice and a size 38 for the skirt and deepened those darts as well as shaping the sides in order to get the two sizes to fit at the middle. And look at this side view, no swayback alteration and yet this fits like a glove:


Because I didn't use a thin fabric like chiffon for the bodice, I chose to use a series of pintucks at the front rather than gathers which I think looks just as good (please ignore that stray bit of fluff on the bodice in these photos - I didn't notice it until afterwards d'oh!).  Although I think it doesn't sit as flat along those vertical seam lines in the front as a soft flowing fabric would have since I used a crisp fabric, but it's not too bad:


However the back is also the interest point of this dress because instead of being the standard centre back zip from neckline to lower back, the zip extends to the top of the skirt only and the bodice instead buttons up at the neckline with a diagonal overlap like this:


I think I was overly worried about gaping there at the back and have put the buttons too far towards my shoulders and hence the strain lines that you can see.  But it's not too tight or uncomfortable so I think I'll leave it because if it does gape open then my bra strap at the back would be visible because the overlap isn't huge there.  But this is also probably the one dress where my poor posture is actually of benefit: because I tend to slump forward this helps the bodice at the back sit flat against my back!

Overall I'm really happy with this dress, even the length was just right for me too without having to shorten it.  The only problem with this dress is that I think I may have created an orphan because it's far too cold in my office all year round to wear it without a jacket, and the two navy suit jackets I have don't match it enough in terms of colour or texture.  I am trying to be less matchy matchy, but I'm afraid that I just can't stand wearing the same colour top and bottom if they don't match exactly - picky I know! I did wear it to work the day after I finished sewing it with one of the navy blue jackets from another skirt suit but it just didn't feel right - I felt frumpy and just wrong all day.

So I'm thinking I may either make a white jacket which would also go well with a few other dresses I have, or sacrifice this dress that I made ages ago and have only worn about three times since which is made from the same fabric (this dress is the leftovers of that dress) and then I can be happily matching.  Or since I'm a sewist with plenty of fabric and patterns at my fingerprints the answer may be to do both - all in good time of course.....

scrap bustin' time

Tuesday 21 June 2011
I'm always on a mission to use up my fabric scraps in a useful way, not just to clear them out of my sewing room but also to justify to myself the need to keep them in the first place! It's just that it can be so unbelievably fiddly making stuff out of little scraps, and I'm not even talking about sewing together a bajillion little squares to make one big quilt.

With wet and cold weather around here recently I needed something to keep Anna occupied too, so I delved into my humongous scrap bag and cut out a whole stack of teeny tiny dresses, tops, skirts and pants:

to glue on to these little paper dolls I picked up for a few dollars from an art supplies shop:

Total success! It kept Anna occupied for at least 10 minutes (only about an hour less time than it took me to cut them out.....), although I think she liked the glueing and tasting the glue best of all.  Every Australian kid eats some Clag glue at some point in their young lives, it's practically a rite of passage:


And now we have a whole village of paper dolls with somewhat mixed up fashion sense:

Best of all I have this awesome tin to store all the pieces in:


I purchased this tin of shortbread biscuits last Christmas purely for the pretty tin,and I knew it would come in handy soon enough.  Take that, doubting husband of mine.

So that took care of a small percentage of the fabric scraps, now to find a use for the rest of it!

And thank you all for the lovely comments on Anna's skirt in the last post.  I didn't pick up on the special connection of making something for Anna from something her great grandmother made many many years before she was born, but now I realise it is pretty special.  Her great grandfather is still alive, but he didn't really recognise the fabric - although I don't know if that's because he is 94 and a bit ill at the moment, or whether it's purely because he's male and doesn't notice these things!

thank you, Queen Elizabeth

Monday 13 June 2011
Us Australians are grateful for the Queen of England gracing us with another public holiday to celebrate her birthday, even though it's about two months after her actual birthday and we don't really have any celebrations like they do in England.  But we're not complaining, we love our public holidays!

For me it meant extra time to get some sewing in, do a photography assignment for my course, go out to dinner with some friends and sneak in a sleep in too.  And best of all? My normal three day working week has been shortened to two days, yippee!

I actually made sewing my photography assignment as the task was to pick a subject, theme or narrative and take 10 shots demonstrating the skills we have learnt in the course: correct exposure, different shutter speeds etc.  And I thought what better narrative than the story of how us sewists transform fabric into something wearable?

I started with this oversized navy polka dot dress that was sewn by my late grandmother and has been sitting in my refashion pile for a few years:


It was just a shapeless shift dress, but she had sewn it with French seams for the side seams, so I just cut it across the width into three rectangle 'tubes' of decreasing length keeping the side seams intact.  Because the polka dot fabric is a thin rayon fabric, I used a cotton poplin in navy blue as a lining cut a little longer so it would peek out:


The waistband casing is actually the lining fabric.  What I did was sew the lining to the skirt, right sides together, flipped the lining to the inside but instead of pushing the lining all the way in and then pressing the edge,  I left a few centimetres of the lining above the sewn edge of the waistline to form a casing for the elastic.  All I did then was to topstitch around the top and the bottom of the casing, insert the elastic and I ended up with a contrasting waistband.  Too easy! And it looks so neat from the inside too:


Of course it wouldn't be one of my projects without a minor stuff up! One that I didn't find until the end and have decided to live with: I accidentally sewed the wrong side of the lining to the right side of the skirt before I flipped it to the inside and so the overlocked edge of the skirt lining peeks out a little bit:


And I used the rolled hem feature on my new overlocker on the edge of those layers which works brilliantly of course! On my old overlocker I had to change the foot plate by unscrewing it, removing and screwing on the other one, and change the presser foot as well as play with the tension to get it to work.  On this one though all I did was take out the left needle, flick a lever, turn the dial and hey presto out came perfect rolled hems. 

Best of all the recipient sure likes it (oh you didn't think this is a skirt for me did you?):


For my photography assignment I also took a series of photos of the steps involved.  I actually only used the pattern shown below as a guide for length because this skirt is basically just a dirndl skirt (rectangles gathered at the waistband), so the pattern piece is really just for show more than anything!


this one is supposed to show the needle going up and down - trying to be artistic!


Because this is only a community college course there is no pass or fail, but I hope my tutor and class like the photos.  We had appalling weather here over the weekend but I think they turned out well!

sewing machine monogamy

Wednesday 8 June 2011
Claire (aka Seemane) asked me in the comments a few posts ago whether I would keep my old overlocker threaded in a neutral colour and continue to use it.  That was my initial plan, until I was half way through sewing my latest project and then I realised there is just no going back! The main reason I got the new overlocker is because it is self threading with auto tension, but the other reason is that I could never get a very good stitch on my old overlocker because the tensions was never quite right.

So I was sewing a rather simple tshirt out of some interlock fabric from the stash using the old overlocker because it was still threaded with navy thread, when I realised I should just change threads in my new overlocker because the threads my old overlocker was making were all loopy and droopy and were driving me mental trying to fix the tension.  Five minutes later my new machine was threaded up and it made a much better stitch that looks so much better.

I made a short sleeve version of the boat neck top 108 from Burda 2/09, such a simple pattern with just three pieces and a turned down neckline:


I even got a few of those stripes lined up at the shoulder seams too which I was pretty pleased with. I think I might have a little problem with stripes though, I seriously have about 7 stripey tshirts in various colours and sleeve lengths in my wardrobe at the moment! It's a tad chilly around here now that we're in winter so this is how I wore it last week:


Ok so it's not snowing weather but it is down to single figures which is pretty cold for us Sydneysiders.  In fact it's so cold I'm thinking of making a jacket for the dog because he's quite lean and has been shivering like crazy lately the poor thing.

I will keep my old overlocker as a back up machine, but I don't think I'll be using it anymore though.  Like I said, once you've tasted champagne you can't go back to vinegar!!

In answer to other recent questions:

Jean - the Opera House was lit up in different colours and patterns, changing every few seconds so it was quite spectacular.

Sewingelle - I had my old overlocker serviced not that long ago which improved things slightly, but I could still never get the tension quite right.  Hope you had better luck with your machine!

Georgeina - for the bibs I used a terry towelling nappy for the back layer, and a mix of woven and knit cottons from the scrap bag for the front.  No inner waterproof layer, mainly because I didn't have any waterproof fabric in the stash, but I find with the nappy fabric on the back they are quite absorbent anyway.

Yoga bag for non bendy people

Friday 3 June 2011
I am not a yoga aficionado. I could never follow the sequence of poses and nor could I ever get my body to co-operate either - I was never very flexible or fit even back in the days before I had Anna when exercise wasn't given last priority in my never ending list of things to do each day.  But I have recently started a course in digital photography and since we did a night field trip this week to practise photography in low light and no light situations, I needed to carry my tripod along with all the other stuff I usually carry.

Then I spied a lithe lycra clad lunchtime exerciser bouncing off to a yoga class carrying her rolled up mat in a drawstring bag with a shoulder strap and I realised that is exactly what I needed to make. However because I didn't want my tripod to get knocked about (or it to knock me about), I quilted two layers of cotton with a layer of batting in the middle.  And after about an hour or so I had a highly functional bag made fully from stash materials:


To pretty it up I sewed a ribbon with a faux tape measure printed on along the shoulder strap, which was also handy for finding the handle in the dark since I made this out of black cotton drill.  I bought this ribbon from Typo store (a stationary store) in the city of all places, bought only because I'm sucker for cute things:


So simple to make - literally a rectangle of fabric sewed along the long edge to create a tube, a circle of fabric sewed onto the bottom and the other end turned over to create a casing for the drawstring.  Sew on a long skinny rectangular strap and you're all done!  Amy Butler even has a free downloadable pattern for a yoga bag as well as some other pretty cool patterns, if you need a little more direction than my one sentence description.

So glad I did make it though, everyone else in my class sure had their hands full lugging around their tripods.  No photo of me demonstrating how great it is (the downfall when you're the photographer I guess), but here's my little model still in her jarmies modelling it for me:


Of course you want to see the photos I took don't you? Too bad I'm going to show you anyway because I'm a little bit proud of how much my photography skills have improved in the last 6 weeks since I began this course.  The Vivid Festival is currently on in Sydney, and down in Circular Quay (home to the Opera House and the Sydney Harbour Bridge) there are many buildings lit up and other light installations in place.  I went on Tuesday night with my photography class but also went back on Thursday night with my husband and Anna because it was just so much fun. 


Clearly I have much yet to learn, but they're not too bad are they? Hopefully this means my blog photos will also improve too now, although since taking photos of myself involves a tripod, remote control and a fair amount of finger crossing I can't guarantee it!