I'm back! Meet Burda 11/2015 #112

Sunday, 24 May 2020
woman posing on the side of the road in blue jeans and a maroon check top

When my enthusiasm for blogging petered out last year, I thought that would be the end of my blog. But someone emailed me recently to ask about a pattern I'd made many years ago and as I was scrolling through my old blog posts to find it I realised that I missed recording my rants and raves about various patterns as well as other snippets of things going on in my life. Instagram is good for a photo, but obviously you just can't capture the details of a pattern and project in that space, so here I am again!

These are strange times aren't they? I am very thankful that I am healthy and I still have my job when so many others have lost theirs due to the COVID-19 shutdown but I am busier than ever with work, two children to homeschool and a dog demanding pats all the time! Working from home has also forced a rethink in my wardrobe, as I don't have enough smart tops to wear and I can't be bothered putting on a dress for the camera.

woman posing in a maroon plaid check long sleeve top

Enter my latest project - a simple funnel neck top with a neckline zipper which helps get it over my head and adds a bit of interest. This fabric - a Marc Jacobs wool bought from the Fabric Store in Surry Hills a few years ago - has had a long journey into becoming this project. Firstly I made this fabric into a shapeless sweater dress but I really should have known better that shapeless looks like a literal sack on my curvy body so I pulled it apart and instead made it into a fitted dress with darts. Which was great until the next wash when the fabric shrunk a little more even though I did prewash and it became too tight to wear.

Finally, I've made it into a top using Burda 11/2015 #112 and I plan to hand wash and stretch it into shape from now on in case it still has a bit more shrinking to do.

technical drawing of a sewing pattern and a model wearing a top with zippered neck
images from burdastyle.com
The only changes I made to the pattern was to lengthen it by 5cm as it is a cropped length and I graded out to the next size below the waist. I really like the centre back seam even though I had to pattern match the plaid because it made it easy to get rid of that sway back pooling I often get.

photo of the back of a woman's top in maroon plaid

Although it's a simple pattern the Burda magazine has illustrated pattern instructions in the magazine. However (and here is my rant!) I don't think the method for the neck zip is the best way of doing it.

photo of sewing instructions from Burda magazine

Essentially you sew cut the seam allowances off, sew the zipper tape on top, then hand sew the ends of the zipper tape together and sew the ribbon over the top of the zipper tapes. Doing it this way leaves a gap between the end of the zipper tape and the shoulder seam, unless my zipper tape is unusually short because I'm sure I transferred the mark from the pattern where the zipper stop goes correctly. I had to sew a small square of fabric to the underside to fill in that gap. I think a better method would be to sew the seam from the shoulder edge to the mark for the zipper stop, and then install the zipper as an exposed zip with a welt pocket type opening instead - this would hide the zipper tape, leave no gap at the end and keep that shoulder seam strong too. Or at lease use a zip longer than the magazine recommends!

four photos showing a close up of the zipper insertion into the shoulder of a top

Ironically it turns out that I should have narrowed the shoulders anyway because this sits off my shoulder point - that would have solved the problem of that little gap! Although looking at the pattern I think it's designed with an extended shoulder.

close up photo of a zipper

photo of a woman wearing a top with a zipper on the shoulder

Because of my forward rounded shoulders (thanks to being a side sleeper and having poor posture) I'm getting a fold of fabric across the front below the neckline. For my next version I would do a forward shoulder adjustment by taking a bit of width out of the front and adding it to the back instead.

photo of a woman posing

So if you're still here reading - welcome back and thanks for sticking around! I hope to get into more a regular routine with my posting. So many projects to catch up on....

Vintage Vogue 1489: giant collared suit

Tuesday, 9 July 2019
After what seemed like an endless summer and non-existent autumn Sydney is finally having some cold weather. I love winter - wearing chunky knits and not having to worry about getting a sunburn from being in the sun for three seconds is definitely my thing! So it's timely that I finally finished sewing a new wool suit for work - actually I finished this about 3 weeks ago but it took me some time to find the right buttons and then get around to sewing them on.

lady posing in a handmade grey skirt suit

When it comes to collars on suit jackets, I usually prefer no collar at all except it seems when the collar is HUGE! This is a 1960 Vogue pattern that is a pretty simple style except for that oversized notched collar.

vintage sewing pattern for ladies skirt suit

Luckily this was a fairly simple project to sew because in true vintage style there was only one page of instructions for the entire jacket. I followed the vintage techniques as well, including hand basting in canvas interfacing instead of using fusible, and pad stitching that giant collar to support it.

close up of a large collar on a ladies suit jacket

I also lengthened the sleeves because my wrists get too cold to wear bracelet length. Apart from that I didn't make any changes - I even put in some slim shoulder pads. I used premade ones though - no one has time to make their own! I'm not sure about those shoulder pads though, they make me feel really bulky around the shoulders and I think my neck looks really short and stumpy in this.

lady posing in a grey wool suit jacket

The back view is fairly plain - darts at the shoulders and vertical darts to give waistline shaping. If only I had better posture and stood up straight then I wouldn't have those annoyng drag lines on the back! 

picture of a back of a lady wearing a skirt suit

It took me a while to find some buttons, and I was very nearly going to make some fabric covered buttons when I stumbled accross these simple angled buttons in Spotlight of all places. I didn't do the bound buttonholes because I thought there was a high risk of stuffing them up and ruining my jacket when it was practically finished. The buttons cover the buttonholes though, and those buttons really make the jacket. At nearly $5 each they are the most expensive part of the jacket, because the fabric I've used was picked up from a Sydney Spoolettes fabric swap last year. It's a gorgeous wool, so I can't understand why anyone would give this away, but I think I've made very good use of it!

image of a large black button

The skirt I've made to go with the jacket isn't from this pattern - I just used my favourite Burda high waisted pencil skirt because I know it fits me perfectly. This is Burda 2/2018 #119, which I've made a few times before, including this cute version in green floral barkcloth that I wear all the time.

image of a skirt sewing pattern


picture of a woman wearing a grey pencil skirt

picture of a woman wearing a grey wool skirt

picture of a woman wearing a grey skirt

Overall I really like this suit even if it makes me look like a football quarterback with those shoulders. Maybe one day I'll undo the lining and remove the pads, but knowing me I'll probably just keep wearing it as it is and just think about doing it everytime I wear it

picture of a woman wearing a grey wool skirt suit


Vogue 9021: it's all about the sleeves

Friday, 26 April 2019

I'm still playing catch up to blog all my completed projects - here's a dress I finished in January and have worn quite frequently since then. This is Vogue 9021 - a simple fitted sheath dress with rather dramatic cut on sleeves.

Those sleeves are my favourite feature of this dress, but unfortunately if you make this pattern according to the pattern the armholes are so low they practically extend down to your waistline and give a clear view of your chest every time you lift your arms. When I made this dress previously I extended the side seam up much higher, so I did that adjustment from the outset this time.


Those sleeves however make it difficult to wear a jacket or cardigan over the top so I'm not sure I'll wear this dress much over the winter. The fabric is an Atelier Brunette viscose that I bought online from the Maai Design on line shop after seeing so many people use this fabric. The fabric is a lot thinner than I expected, and a bit transparent so I fully lined this dress in a thin navy blue cotton poplin.

I have to admit that I bought this fabric purely because of FOMO - I saw so many great garments popping up in my Instagram feed that I simply had to have some. But now that I've made it into a dress, even though it's a pattern that I love, I just feel a bit blah about it. I can't quite decide whether it's because the print feels a bit 1980s to me or whether I just feel a bit frumpy in this, but either way I don't love it as much as this palm print version I made from a cotton sateen last year:


I didn't buy much of this fabric because it's on the pricier side, so I didn't have enough fabric to spare to pattern match at the seams. It's such a busy print that I doubt it's noticeable at all to someone who doesn't sew.


In terms of the pattern it really is very simple and definitely deserves to be in the Very Easy Vogue category. I did grade between sizes as usual - smaller at the top and larger at the bottom, and thanks to the waistline with darts it is easy to get a close fit at my sway back.


Vogue 8667 - finally got there

Monday, 15 April 2019
Every so often I glance at my UFO pile and think about finishing some of those projects languishing in it. Well finally I have finished one after several attempts and it is such a relief to get it done to a wearable stage!


This is Vogue 8667, a princess seamed dress with a rolled collar and a skirt options. Looks pretty simple right? I had originally set out to make view E - the straight skirt and short sleeved version.
I don't know why it took me so long to finish this - I just kept losing steam at every hurdle. Firstly I should have measured the flat pattern pieces more carefully to make sure I sewed the right size, because it turned out way too big. So I set it aside for a while to think about it. A few months later I picked it up again and pin fitted it while wearing it - I had to take the dress in quite substantially at the sides to make it fit across the bust. I also flattened the bust curve to make a faux small bust adjustment.

But once I had made that change the sleeve would no longer work - it was too big to fit into the now much smaller armhole opening, but making the sleeve narrower made it too tight to fit my arms! So away it went again for a few more months. Finally in January this year I decided to either finish it or scrap it, but thankfully it worked out. I changed the sleeve to a cap sleeve so I could get the shoulder coverage but not the tight feeling around my bicep - it all worked out in the end phew!


But the real star of this dress is the rolled neckline. I love the wide neckline and stand up collar - I feel very ladylike when wearing this, but it does make it hard to wear a jacket or cardigan over it.


I've left the collar at the back to splay open above the top of the zip. It is meant to have a hook and eye at the collar roll line (ie at the halfway point of collar) to make it stand up slightly, but I knew from past experiences with this type of collar that the hook and eye never stay closed and my hair tends to get caught in it instead.


The other design aspect I like about this pattern is the waist seam - it helps get a neater fit for my swayback. It causes pattern disruption at the waist line of course, but in a busy print like this it's barely noticeable but you can see from the side view that the fit is quite tailored.


The back view is rather plain and simple, with just a small walking vent


So even though it took me a very long time to finish this dress, I'm glad I didn't give up on it and preserved until the end. I really can't explain why I had no enthusiasm for this particular project - the fabric is a lovely double knit from the Remnant Warehouse in a great teal and lilac coloured print and I do love the design lines of the pattern. I guess that sometimes you just need to be in the right frame of mind.

My current favourite skirt: Butterick 5441

Sunday, 24 March 2019
I never would have thought that a simple 1980s pattern with a rather dowdy cover illustration has become a favourite skirt pattern of mine! But I've now made four versions of Butterick 5441, with no plans for stopping yet.

lady modelling four versions of pleated skirts


It's a fairly simple mid length skirt pattern which until last year was definitely not a length I'd usually wear since I'm not particularly blessed in the height department. However I have discovered that this length can look flattering, and has the added bonus of covering up my legs on those lazy days when I haven't shaved my legs.

After four versions I've now made a few modifications to perfect the fit - instead of gathers at the front I pleat the fabric so it sits flatter across my stomach, I've shifted the zip from the side to the centre back and instead of gathers at the back I put in darts instead.

The latest version I made is from a leopard print cotton, jumping on the animal print trend that seems to be everywhere right now. It's a fairly thick cotton with little drape, so it makes the skirt flare out quite a bit which I like. It has pockets which is always useful!


A change in top and shoes makes it look quite different I think.


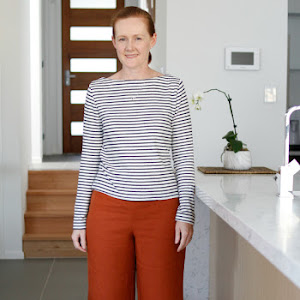
Back in January I made a version from a mid weight linen in paprika from The Fabric Store which was left over from some wide leg pants I made last year. This one drapes nicely because the linen has softened up a lot after many washes.

lady wearing a rust coloured pleated skirt and blue and white stripe tshirt

lady wearing a rust coloured pleated skirt with blue and white stripe tshirt

For this version I shortened it to knee length so that I could squeeze it out of the leftover fabric and added belt loops for a self fabric tie belt.


The second version I made last year in December (that's why there's a Christmas tree in my photo I swear!). This is a gorgeous cotton print in a deep teal colour I bought from Nerida Hansen during one of their irresistible sales. I also shortened this to knee length as I only bought a remnant piece.


Finally, here is the original version I made back in 2017 (blogged here) made in a lovely yellow Japanese cotton I picked up from a Sydney Spoolettes fabric swap that was kindly donated by Stef. This one is still in high rotation in my wardrobe, so clearly it's a winner!