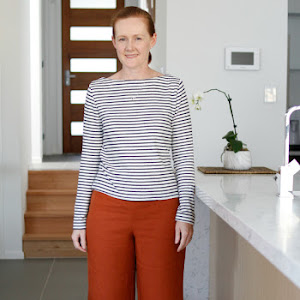
After a cracking first half of the year with my Burda challenge, I've fallen a bit behind lately - I've only just finished the July project and nearly finished the August project. I am determined to get it back on track though, so it's all Burda around here at the moment.
The July issue landed in my letter box later than usual in July, and it was right in the middle of when I was making all those gold sequin jackets which took all my time and my enthusiasm for sewing. Before I knew it, the August issue then arrived, I was still making other things, the September issue arrived and I was officially behind. Better late than never though - here is my July project:
I picked
7/2016 #105, 'the cut out dress', which looked simple enough but trust me it caused many headaches. This is Burda's version:
In typical Burda style, the instructions are very sparse and not very helpful. Usually this isn't a problem for me because I know the order of construction and how to make most garments from experience, but the neckline treatment of the extra shoulder piece on the right shoulder really stumped me. On first reading, the instructions appear to tell you to cut the seam allowance off the right hand side. This is wrong - it turns out there is a little line on the right shoulder and it's the seam allowance for this that needs to be cut off.
Whilst I spent several days trying to figure this out and just getting annoyed, Shannon over at
Frogs in a Bucket not only made a great version of this dress but also posted some very helpful instructions on how to make the neckline. If you're thinking of making this dress definitely check out her post because it will save you some tears of frustration! So I had to recut the back bodice piece because cutting off the seam allowance means there nothing to sew the neckline to, and using Shannon's instructions and photos I got through it.
Unfortunately I then tried to race through the rest of the dress, which coupled with sewing late at night meant a few more mistrakes before I was finished. The neckline strap needs to be sewn and turned out like a tube
before you sew the rest of the neckline to the front and back bodices - if you don't you'll have to get out your trusty unpicker like I had to!
And then annoyingly my invisible zipper split in half after I had sewn it in perfectly matching the waist seams, which meant another journey to the fabric shop for a zipper (not that I'm complaining about that!) and more unpicking. After putting in the second zipper I realised the neckline was mismatched, so more unpicking and re-sewing:
But after all that, the rest of the dress came together quite easily because essentially it's just an a-line dress with that funny shoulder flap. Thanks to the waist seam with darts I managed to get a great fit in my swayback, and the side and back silhouette turned out well:
I do prefer how it looks with a belt though, it seems to break up the fabric better:
Speaking of the fabric, it's just a cotton sateen bought from Spotlight many years ago that I really liked. Being a sateen it wrinkles quite badly, but the print covers that up well and it was thick enough not worry about a lining. Hopefully the colours don't fade as much on this fabric as I've experienced on other cotton sateens from Spotlight - it's a bit hit and miss with their fabrics sometimes.
So after all the efforts to get this dress done I can't say it's one of my favourites. I like the idea of the neckline, but the neckline band sits very high and feels like it is choking me when I am sitting down. The shoulder piece also gapes open a bit even though the bottom part is stitched down to the bodice but it does remind me to stand with my shoulders back and not slump forward like I usually do.
If you're thinking about making this dress, then I highly recommend Shannon's
post for more helpful instructions than you'll find in the Burda magazine and hopefully you'll avoid all the headaches this dress caused me.


