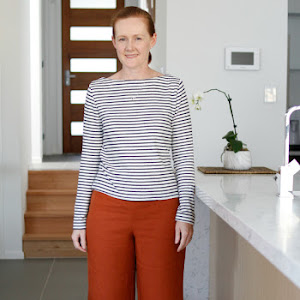
Burda of the Month: 10/2016 #113 W I D E leg pants!

Saturday, 19 November 2016
So I may have finished my October Burda of the month project in mid November, however since my November issue hasn't yet arrived I am technically up to date in my Burda challenge - yay for me!

There were quite a few lovely dresses in this issue, however I decided to step outside my comfort zone and make something I don't think I've ever made before - a pair of wide leg pants:

Burda 10/2016 #113 sailor pants www.loweryourpresserfoot.blogspot.com

This is Burda 10/2016 #113, which are called 'Sailor Pants' by Burda however I decided to leave off the buttons on the pockets which I think are a bit OTT nautically themed:

Burda 10/2016 #113 sailor pants www.loweryourpresserfoot.blogspot.com

These pants legs are super wide, and it feels quite strange to have fabric swishing around when I walk after so many years of wearing skinny leg jeans and pants. And I'm still not sure where I will wear these pants - even if fashion magazines are declaring the death of skinny legs, no-one in my neighbourhood is getting around in flares or palazzo pants yet.

Burda 10/2016 #113 sailor pants www.loweryourpresserfoot.blogspot.com

I wasn't sure if I'd like this pattern and I was just hoping these would turn out to be a wearable muslin (ie the cross your fingers and hope you make something half decent approach!). I've had this fabric in the stash for a long time - it's just a poly/cotton mix which came from an op shop and I have lots of it so there was nothing to lose, but it has the perfect weight and drape. It does however wrinkle terribly - those creases at the front aren't whiskers due to tight fit but rather wrinkles for sitting down for the 3 minute car drive to get to the waterfront!

I'm also a bit unsure on how to style wide leg pants. Consulting Dr Google, apparently a chunkier shoe such as a wedge or a platform should be worn - neither of which I own. I did try them with flat shoes, but of course that only works if you have hemmed the pants to the right length. These pants were ridicously long - I chopped 15cm off the bottom, sewed a 5cm hem and they are still way too long to wear these pants with flats because it just looks baggy and a bit sloppy:

Burda 10/2016 #113 sailor pants www.loweryourpresserfoot.blogspot.com

Because I didn't make a muslin I had to make some fitting changes which didn't turn out so perfect. I should have known before I cut these out that I would have gaping issues at the centre back - I ended up re-cutting the waistband to have a centre back seam so that I could curve it more, and I had take a wedge out of the centre back seam at the waist, which means the waistband dips a bit too low. There are also loads of annoying wrinkles at the back, partly due to the annoying fabric showing everything but also due to these lazy fitting changes:

Burda 10/2016 #113 sailor pants www.loweryourpresserfoot.blogspot.com

I also found this pattern to run rather small. My measurements placed me between sizes, so I sized down because I find there is usually a lot of ease in Burda patterns, however these turned out really tight and I had to let out all the seams as far as I could to make them more comfortable. But you can see in the photos above and below those wrinkles pointing to my saddlebag thighs which are my widest point and cause of most of my fitting woes:

Burda 10/2016 #113 sailor pants www.loweryourpresserfoot.blogspot.com

But enough about the negatives, on to the good points. I do like the pockets that sit flat on the front of the pants - because pockets usually sit at my widest point I generally avoid putting them in the side seam because they just add bulk. I also did a pretty good job at matching the stripes on the pocket and the pants front:

Burda 10/2016 #113 sailor pants www.loweryourpresserfoot.blogspot.com

I also like the wide waistband - I find them more comfortable and they generally sit across my stomach rather than cause a muffin top. These pants have an invisible zip on the side, so the waistband pieces are cut on the fold. Because of the curve in the waistband it wasn't possible to match up all the pinstripes, so I focused on matching those at the centre front:

Burda 10/2016 #113 sailor pants www.loweryourpresserfoot.blogspot.com

So overall I'm a bit on the fence about this project. On the one hand, I think they look pretty good in these photos (apart from those wrinkles) and it was a very easy pattern to make. However I'm not sure how practical they are in real life - what to wear with white and blue pinstripe pants? Where to wear such swishy, wide leg pants? And how to keep them clean? Just wearing them for these photos resulted in the hem getting so dirty I had to change out of them straight away. This is one of the few times I've worn something just for the sake of taking blog photos - I feel like a bit of a fraud to tell you the truth! 

Burda 10/2016 #113 sailor pants www.loweryourpresserfoot.blogspot.com

Anyway, if wide leg pants are your thing I can thoroughly recommend this pattern to you, I think they would look quite dramatic in silky black material paired with a sparkly top for evening wear, but overall this is a lot of look for a daytime for quiet ol' me!

Burda of the Month: 9/2016 #108 blazer

Sunday, 6 November 2016
Burda 9/2016 #108 tailored blazer in pink wool www.loweryourpresserfoot.blogspot.com

Finally I have finished my September Burda project - it's been sitting in my sewing room untouched for at least the last three weeks. I made the outer part of the jacket quite quickly but when I got to the lining I suddenly lost all enthusiasm for sewing. Life has just been so busy lately and it's been easier to plan sewing projects, browse on-line fabric stores and read about other people's sewing achievements than actually tackle my own. But happily now it's done!

My pick from the September issue is probably no surprise to regular long term readers - I love a tailored blazer, especially one without a collar. This project is pattern 9/2016 #108:

Burda 9/2016 #108 tailored blazer www.loweryourpresserfoot.blogspot.com
Image via Burda Style
For once the magazine photo pretty much resembles the pattern and how it fits - no photoshopping or sneaky clipping the garment behind the model's back to get that fit. The pattern comes in petite sizing and I made a size 17 at the shoulder grading out to 18 at the waist and 19 at the hips which seemed to work well enough for me. I didn't lengthen the bodice to account for my long waist so the button sits a little higher on me than the model photo, but it looks good enough to me.

The back fit is superb on this one. The centre back seam and princess seams meant I could shape the back really well, and there is only a little bit of excess fabric under my armpit which is usually my problem area when fitting jackets:

Burda 9/2016 #108 tailored blazer in pink wool www.loweryourpresserfoot.blogspot.com

I really like the two darts at the neckline, it's something that is common in vintage patterns but not so much in modern patterns but it gives a nice shape:

Burda 9/2016 #108 tailored blazer in pink wool www.loweryourpresserfoot.blogspot.com

The sleeves hang really well in this jacket and the shoulder was spot on without me doing my usual narrow shoulder adjustment. I didn't use any shoulder pads, but I did put in a sleeve header. Annoyingly the sleeve header seems to be visible and is a bit ripply, so I'm considering taking them out:

Burda 9/2016 #108 tailored blazer in pink wool www.loweryourpresserfoot.blogspot.com

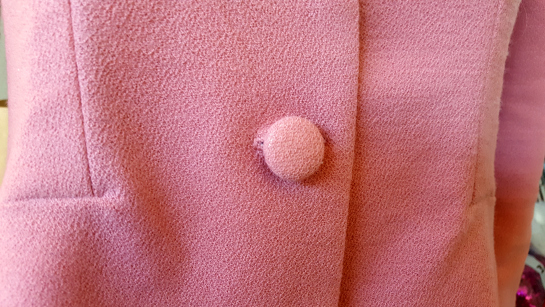
The fabric I used is a pink wool crepe that has been in the stash for a long time, that I bought from a garage sale. Because the fabric wasn't quite jacket weight I block interfaced all the pieces with whisperweft interfacing, and then added a second layer at the front and back neckline. I couldn't decide on a button to go with the pink fabric though, so I made a fabric covered button instead - this way it matches perfectly!

Burda 9/2016 #108 tailored blazer in pink wool www.loweryourpresserfoot.blogspot.com

You might notice I also left off the welt pockets - I never use pockets in my jackets anyway and there's a good chance of making terrible welts and ruining the front so I left them off. That dart was a little tricky because of the sparse Burda instructions, basically you need to cut into the pattern horizontally to sew the vertical dart, and then sew the bottom of the dart and jacket together to make that horizontal line. I've got a little but of bubbling at the point as you can see in the above photo, but it's not too noticeable.

Apart from the dart, it's a very simple jacket to make and would have been quick to make if I didn't suffer a severe case of loss of sewing mojo! When I did pull my socks up and just got on with it, the lining was easy enough to make and quick to attach using the bagging method (see this Grainline Studio tutorial for the best visual explanation I've seen so far).

One last thing before I finish up this post. Anyone notice anything different about these photos? Apart from the poor quality - my DSLR is in for a service at the moment and I made Anna take these pictures with our little point and shoot camera. Anyone spot the change?

Burda 9/2016 #108 tailored blazer in pink wool www.loweryourpresserfoot.blogspot.com

No more glasses for me - I had laser eye surgery last Thursday afternoon and by Friday morning I was marvelling at my new found amazing eyesight. I've worn glasses since I was 11 years old, so it's pretty strange to not wear them after 28 years - I still find myself putting my hands to my face to push up glasses that are no longer there! I can't wear any eye make up yet or get water in my eyes while they heal, but since I won't be hiding behind frames anymore it's time to learn how to apply eyeshadow and eyeliner. The surgery itself was rather painful but it was only 4 minutes per eye, and it was ridiculously expensive (I could have bought a fancy schmancy Bernina sewing machine instead) but it's totally worth it, even if my kids do think I look weird.

Susan Khalje Couture Sewing School in Sydney

Saturday, 22 October 2016
If you follow the Australian Sewing Guild or Tessuti Fabrics on Facebook you've probably already discovered that Susan Khalje is coming to Australia early next year to run sewing courses in Sydney, Melbourne and Brisbane. And now that I'm safely booked in, I'm sharing it here in case you didn't already know!

Susan Khalje is a very well known sewing expert, particularly for her Classic French Jacket class which I've read lots about from various people who have attended her classes. I think it's a bit of a once in a lifetime experience to attend one of her classes, especially for us not located in the US.

On offer during her 2017 Australian Teaching School are the 7 day Classic French jacket sewing class, a 6 day Couture Sewing school, a 3 day Guipure Lace skirt class and a 2 day Couture Techniques class. The courses are pretty expensive, but I think hands on learning directly with the expert will be a priceless experience that you just can't replicate via on-line videos and books. Plus it's certainly cheaper than flying to the US!

I've enrolled into the French jacket sewing class and the 2 day couture techniques class which means that now I just have to purchase some suitable fabrics! There are so many inspiration photos out there, and I can't just decide whether I want to go with something classic like black and white, or something more colourful.

Since I'm making a classic French jacket I thought I'd buy something from the suppliers to Chanel: Linton Tweeds. I found some beautiful fabrics, but at 26 - 34 pounds per metre plus shipping (and the conversion rate) that is eye wateringly expensive for one garment so sadly I've ruled them out. But they are so pretty!
image via Linton Tweeds
And so the second part of my public service announcement post: Bewitch Fabrics in Leichhardt (Parramatta Road) is closing down and having a 50% off sale. I've never actually been inside their shop because I always assumed they only sold bridal fabrics based on what I could see in the window  as I chug past in the bus, but I have been told that they have a wide range of high end fabrics. And now I have a solid reason to go hunting - for a change I actually do need to buy some fabric and there's a sale, so it's a win-win situation. I shall report back when I'm successful!

August Burda of the Month: 8/2016 #113 lace dress

Sunday, 16 October 2016
Being very late in making this month's Burda project has ironically worked out for the best - the Burda August is always full of summer clothes but that's in the middle of our winter which makes it hard to get enthused about making anything. But since the weather is warming up around here and I have a few Christmas parties coming up late next month it was very easy to pick out a project from this issue.
Burda Style 8/2016 #113 couture dress www.loweryourpresserfoot.blogspot.com

Burda describes this as a Couture Dress - pattern number 08/2016 #113 - but I think they're using the phrase 'couture' a bit liberally since there's little couture about the construction methods. Regardless, it's a great looking dress:
Burda Style 8/2016 #113 couture dress www.loweryourpresserfoot.blogspot.com
Image via Burda Style
This is a tall pattern and comes in size ranges 72 - 88. Burda tall sizes are designed for ladies that are 176cm or taller, which I am definitely not! But I am long waisted, which meantt the waist line of this pattern hit me in the right spot but I did reduce the skirt length by 18cm.

I did forget to alter the depth of the armscye though, and you can see that my dress sits quite low under my arms in comparison to the model's picture above. But it's not scandalously low, and I can still wear a strapless bra with this dress without it showing.

Burda 8/2016 #113 couture dress in lace www.loweryourpresserfoot.blogspot.com

I decided not to make the belt that came with the pattern because it involves several layers of fabrics folded origami style and my fabric is quite spongy and would have been too thick to look any good. The fabric is a lace I bought from The Fabric Store a few years ago, which if I recall correctly is a Marc Jacobs fabric:

Burda 8/2016 #113 couture dress in lace www.loweryourpresserfoot.blogspot.com

It has a small amount of stretch which was lucky for me since my dress turned out a bit on the snug side (might be time to retake my measurements after a slothful winter!). The fabric is a bit transparent though, which you can see when I hold the fabric up to the light - that's the seam line running down the middle:

Burda 8/2016 #113 couture dress in lace www.loweryourpresserfoot.blogspot.com

So I decided to fully line this dress instead of just the bodice as required by the pattern. I used a very stretchy polyester knit for the lining which meant I could just sew the skirt as a tube rather than with the split. The wrap of this dress is very deep so it's unlikely to have a wardrobe malfunction, but with this lining there is no chance of accidentally flashing anything at all:

Burda 8/2016 #113 couture dress in lace www.loweryourpresserfoot.blogspot.com

As usual, a fitted dress with a waist seam and darts suits my figure and I managed to get a very close fitting dress without any pooling at the small of my back (the stretch of the fabric helps with that as well).

Burda 8/2016 #113 couture dress in lace www.loweryourpresserfoot.blogspot.com

I made a slight change to the construction at the back. I chose not to run the invisible zip right to the top of the neckband because I thought that trying to get the zipper head past the bulky neckband would be difficult. Instead I stopped it below the neckband and instead sewed on a button and elastic loop to hold the neckband together. It doesn't work so well, as you can see in the photo below the neckband doesn't sit very nicely together, but it will be covered by my hair so it's good enough for me:

Burda 8/2016 #113 couture dress in lace www.loweryourpresserfoot.blogspot.com

Overall, I love this dress. It's a very simple silhouette, a bit sexy without showing too much skin at all and very easy to sew. If I make this again I would use a solid fabric because I love the look of the darts meeting in an inverted 'v' at the side seam, but that detail is lost in this busy fabric. And I'm also very pleased at finally using this fabric - it's another piece in my stash that I've been wanting to use for a very long time but the right pattern just didn't come along until now.

Burda 8/2016 #113 couture dress in lace www.loweryourpresserfoot.blogspot.com

July Burda of the Month: 7/2016 #105 the cut out dress

Thursday, 6 October 2016
After a cracking first half of the year with my Burda challenge, I've fallen a bit behind lately - I've only just finished the July project and nearly finished the August project. I am determined to get it back on track though, so it's all Burda around here at the moment.

The July issue landed in my letter box later than usual in July, and it was right in the middle of when I was making all those gold sequin jackets which took all my time and my enthusiasm for sewing. Before I knew it, the August issue then arrived, I was still making other things, the September issue arrived and I was officially behind. Better late than never though - here is my July project:

Burda 7/2016 #105 cut out dress www.loweryourpresserfoot.blogspot.com

I picked 7/2016 #105, 'the cut out dress', which looked simple enough but trust me it caused many headaches. This is Burda's version:

Burda 7/2016 #105 cut out dress www.loweryourpresserfoot.blogspot.com
images via Burda Style
In typical Burda style, the instructions are very sparse and not very helpful. Usually this isn't a problem for me because I know the order of construction and how to make most garments from experience, but the neckline treatment of the extra shoulder piece on the right shoulder really stumped me. On first reading, the instructions appear to tell you to cut the seam allowance off the right hand side. This is wrong - it turns out there is a little line on the right shoulder and it's the seam allowance for this that needs to be cut off.

Whilst I spent several days trying to figure this out and just getting annoyed, Shannon over at Frogs in a Bucket not only made a great version of this dress but also posted some very helpful instructions on how to make the neckline. If you're thinking of making this dress definitely check out her post because it will save you some tears of frustration! So I had to recut the back bodice piece because cutting off the seam allowance means there nothing to sew the neckline to, and using Shannon's instructions and photos I got through it.

Unfortunately I then tried to race through the rest of the dress, which coupled with sewing late at night meant a few more mistrakes before I was finished. The neckline strap needs to be sewn and turned out like a tube before you sew the rest of the neckline to the front and back bodices - if you don't you'll have to get out your trusty unpicker like I had to!

And then annoyingly my invisible zipper split in half after I had sewn it in perfectly matching the waist seams, which meant another journey to the fabric shop for a zipper (not that I'm complaining about that!) and more unpicking. After putting in the second zipper I realised the neckline was mismatched, so more unpicking and re-sewing:

Burda 7/2016 #105 cut out dress www.loweryourpresserfoot.blogspot.com

But after all that, the rest of the dress came together quite easily because essentially it's just an a-line dress with that funny shoulder flap. Thanks to the waist seam with darts I managed to get a great fit in my swayback, and the side and back silhouette turned out well:

Burda 7/2016 #105 cut out dress www.loweryourpresserfoot.blogspot.com

Burda 7/2016 #105 cut out dress www.loweryourpresserfoot.blogspot.com

I do prefer how it looks with a belt though, it seems to break up the fabric better:

Burda 7/2016 #105 cut out dress www.loweryourpresserfoot.blogspot.com

Speaking of the fabric, it's just a cotton sateen bought from Spotlight many years ago that I really liked. Being a sateen it wrinkles quite badly, but the print covers that up well and it was thick enough not worry about a lining. Hopefully the colours don't fade as much on this fabric as I've experienced on other cotton sateens from Spotlight - it's a bit hit and miss with their fabrics sometimes.

So after all the efforts to get this dress done I can't say it's one of my favourites. I like the idea of the neckline, but the neckline band sits very high and feels like it is choking me when I am sitting down. The shoulder piece also gapes open a bit even though the bottom part is stitched down to the bodice but it does remind me to stand with my shoulders back and not slump forward like I usually do.

Burda 7/2016 #105 cut out dress www.loweryourpresserfoot.blogspot.com

If you're thinking about making this dress, then I highly recommend Shannon's post for more helpful instructions than you'll find in the Burda magazine and hopefully you'll avoid all the headaches this dress caused me.

Admitting to my mistakes - so you can avoid them!

Thursday, 29 September 2016
Not everything I sew makes it onto the blog - I hardly think it's worthwhile sharing all the pyjama pants, t-shirts and track suit pants I make for myself and the kids because I have nothing meaningful to say about them and they're not glamourous enough for just a show and tell type post!

So the tops I'm about to share here almost fall into that category, except that I made a simple mistake on each that I mainly want to post here as a note to my future self, but it may help someone else avoid them too. Plus I'm keeping it real - even experienced sewers sometimes commit simple stuff ups so no one ought to feel bad about that all.

First up, a simple round neck top from Burda 2/2011 #106 which I've made many times before and is my go to pattern for long sleeve t-shirts:

Burda 2/2011 #106 polka dot top www.loweryourpresserfoot.blogspot.com

Burda 2/2011 #106 top www.loweryourpresserfoot.blogspot.com

This one is made from a light sweater type knit fabric that I wanted to be able to wear over other layers for warmth in winter so I needed it to be a little looser than the others I had made. Instead of thinking it through properly and slightly increasing the width of the body and sleeves I simply traced out a larger size and made that up. Well that meant the top is too large through the shoulders and the sleeve cap hangs off my shoulder:

Burda 2/2011 #106 polka dot top www.loweryourpresserfoot.blogspot.com

I've left as is and happpily wear this top, but it does annoy me everytime I look at it. It's a common complaint I hear about some plus size patterns - that when pattern drafters grade up a pattern they increase all measurments equally, even though shoulder width doesn't usually increase as dramatically as say the bust between sizes. Note to future self - next time fix the pattern properly and don't look for the quick solution!

This fabric is awesome though - it's a polyester knit that I bought recently from The Remnant Warehouse (when I was there buying them out of gold sequin fabric), and the dots are actually flocked velvet. It's very tactile, and I do find that my kids like to touch it whenever I'm wearing it. They also had this fabric in a blue and a brown colourway that I had to restrain myself from buying since I only need so many polka dot tops after all.

polka dot fabric www.loweryourpresserfoot.blogspot.com

Ok, onto the second mishap. In August we went skiing with a large group of friends, and given that I dislike both the cold and doing exercise I was a bit apprehensive. So I sort of went overboard buying warm thermals to wear under the ski gear and chunky wool jumpers to wear when not skiing. I also decided to make a high necked top to wear to make doubly sure that no cold air was going to sneak in my ski jacket when I was trying not to break bones on the ski slopes. Sue at Quilt Sew, Sew Sue had previously recommended Burda 9/2010 #121 (not available for download unfortunately) a while ago, and a quick google search revealed that loads of other people had made it too so I figured I couldn't go wrong.

Burda 9/2010 #121 funnel neck top in french terry www.loweryourpresserfoot.blogspot.com

Burda 9/2010 #121 funnel neck top www.loweryourpresserfoot.blogspot.com

It is a very simple, quick and easy top to make. Essentially it's just three pieces - the front, back and sleeves and the neckline is formed by cutting out an extra long neckline and then folding it over. My mistake with this one is that my fabric has very little stretch so it's very hard to get over my head (either that or my head is larger than the average German head!). This fabric is also wonderful though, despite the stretch. Another purchase from The Remnant Warehouse earlier in the year it's a French terry knit - one side is smooth and the inside is looped fibres. I've worn this a lot and it hasn't pilled at all yet. I only wish I bought more of it at the time, because sadly it's all gone now.

french terry fabric www.loweryourpresserfoot.blogspot.com

I find the neckline a bit annoying though - it's only sewn down at the side seams which means that the fabric at the front wants to roll up and it gets a bit bunchy. I overlocked the edge of the fabric hoping that would keep it flat, but I think I really need to stitch it down the whole way around.

Burda 9/2010 #121 funnel neck top in french terry www.loweryourpresserfoot.blogspot.com

Burda 9/2010 #121 funnel neck top in french terry www.loweryourpresserfoot.blogspot.com

The sleeves on this one are also really really long! In the Burda photo you can see it's meant to be worn scrunched up a little around the wrists, but because my fabric doesn't have enough stretch it doesn't stay like that. Note to future self: choose a stretchier knit and reduce the sleeve length.

Burda 9/2010 #121 funnel neck top in french terry www.loweryourpresserfoot.blogspot.com

The final project for this post is made from some beautiful wool fabric I bought from the Tomato fabric store when I was Tokyo this time last year. This was one of those fabrics that I really wanted to use but couldn't decide on the right pattern because I didn't want to waste it. Eventually I settled on Kwik Sew 3915, which is a simple top with a v-neckband that I've made once before:

Kwik Sew 3915 v neck top www.loweryourpresserfoot.blogspot.com

Regrettably I only bought a single metre of this fabric (it was quite expensive and by that stage I had already bought a lot of fabric!), I had to change the neck band by reducing the width to remove those gathers and the fold over bit at the back of the neck . The v-neck point turned out perfectly, and in fact I like it better than the gathered version:

Kwik Sew 3915 v neck top www.loweryourpresserfoot.blogspot.com

Unfortunately I didn't think about what changes the back of the neckline would also require. Now that it didn't need to turn over on itself outwards, I really should have angled the centre back seam so that it would sit snugly against my neck, and since I didn't the neckline sags open at the back:

Kwik Sew 3915 v neck top www.loweryourpresserfoot.blogspot.com

I've been wearing this lots though despite this problem, and the easy fix is to wear my hair down so that it covers it! Note to future self - make this again, but change that centre back seam.

So there you have it - nothing major but I guess what annoys me the most about these is that they were easily avoidable. They are also easily fixed, but since that involves unpicking overlocked stitches on knit fabrics that won't be happening anytime soon!

Perfecting my pencil skirt: Burda 12/2013 #118

Thursday, 8 September 2016
Burda 12/2013 #118 houndstooth pencil skirt www.loweryourpresserfoot.blogspot.com

Making a new skirt is such a satisfying project because it's so quick to make and usually turns out pretty good (unlike my ongoing failure to make a decent fitting pair of pants!). However, there is always room for improvement so I keep on making further refinements in the quest for a perfect pencil skirt.

For this version, I've used Burda 12/2013 #118 which I made in a floral cotton fabric 2 years ago and is a good simple silhouette to start with:

Burda 12/2013 #118 houndstooth pencil skirt www.loweryourpresserfoot.blogspot.com


I found the pattern to be more a straight shape and not as pegged as the pattern drawing suggests, so for this version I took it in quite a bit at the side seams to get a more fitted shape. I managed to get excellent pattern matching horizontally, but you can see the curved side seam vertically:

Burda 12/2013 #118 houndstooth pencil skirt www.loweryourpresserfoot.blogspot.com

I also made the waistband slightly more curved than my previous version - the pattern has a straight waistband which doesn't work for my shape at all. The curve of the waistband is really noticeable on the front due to the houndstooth pattern of the fabric. It wasn't until I looked at these photos that I realise I should have cut the waistband the other way around, but I can live with this because that sort of detail is noticed by no one else!

Burda 12/2013 #118 houndstooth pencil skirt www.loweryourpresserfoot.blogspot.com

The back view is ok, pattern matching along the zipper is not so great, and the darts interrupt the pattern as well but it fits well and that's what matters most. The changes I made to the original pattern were to put in a mitred vent at the skirt opening instead of just a split, and to finish the zipper below the waistband so that I could instead use a hook and bar on the waistband - I feel that is more sturdy that extending the invisible zip all the way to the top.

Burda 12/2013 #118 houndstooth pencil skirt www.loweryourpresserfoot.blogspot.com

I've fully lined the skirt in a bemberg lining, although since this fabric is a very substantial woven cotton it probably would have been ok without it. I bought this fabric from The Fabric Store during one of their regular 40% off sales last year (or the year before? Time flies when you buy fabric for no particular project!) and the fabric is just lovely. One of those fabrics that I wish I bought more.


A pencil skirt isn't hugely exciting or ground breaking but it is a real staple of my work wardrobe - I've been wearing it with the white wool blazer I made last year during the cold weather in the last few weeks. That white blazer is one of the best things I've ever made, it's so versatile and gets worn so frequently.

Burda 12/2013 #118 houndstooth pencil skirt www.loweryourpresserfoot.blogspot.com

Hooray for quick but effective projects I say!