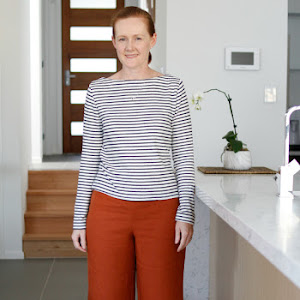
What I wore: Vogue 2538

Monday, 24 June 2013
Thank you to all the ladies that braved the cold, windy and rainy weather on Sunday afternoon for our high tea - I had a fabulous time talking sewing and blogging and fabrics and patterns for hours on end with you all. You can certainly tell we are a dedicated bunch of sewists by the way that the pattern used to make garments worn on the day were being recognised as effortlessly as some people can spot designer labels! Unfortunately I was too busy talking to take any photos, but believe me that everyone looked absolutely gorgeous in their wonderful self made garments.

And for all those who asked me on the day what pattern I used for the dress I was wearing I apologise for being so vague. I made the dress way back in 2007, pre-blogging days in fact, and I've only worn it a handful of times over the years (originally posted here).  But it turns out the pattern I used is Vogue 2538, long since out of print, although I modified it slightly by sewing three quarter sleeves instead of cap sleeves.


I made it from a cream wool with a pale grey plaid, which I've fully lined so you can understand why it's had relatively few wears over the last 6 years - there's not many occasions to wear a very warm wool dress in white, particualrly in Sydney. I did end up wearing it to the high tea with black tights and shoes purely for warmth, very similar to how I styled it back in the original post in 2008:


I haven't changed much in five years have I?

I have actually been thinking of refashioning it into a jacket or something that I may wear more frequently because it is lovely fabric, so I'm pretty glad I decided to wear it on Sunday because it just may be it's last outing.

Now I hope to get back to my usual sewing and have something new to show off shortly!

Little boys and bow ties

Saturday, 22 June 2013
I slowly eased myself back into the sewing habit this week, although I don't have much to show for it. I'm halfway through making a dress testing the Sugarplum dress pattern for Lolita Patterns which is a lovely dress but rather involved and time consuming so it's taking longer than I expected, not helped of course by me getting terribly sick last week and losing my sewing mojo.  I also made two pairs of pants for my friend's baby son who I think is the baby that all the commercial patterns size their patterns for - he is the fattest baby I've ever seen! He is three months younger than Toby but is a few kilos heavier which is pretty amazing since he refused to eat solids until very recently, and my friend has the hardest time buying pants for him that aren't tracksuits. So I made a pair of simple elastic waist corduroy and denim jeans for him from the same pattern that I was complaining were way too big for Toby.  But I forgot to take any photos before I gave them to my friend - I guess I fail blogging 101......

Toby went to his first birthday party during the week so I made him a little bow tie out of some red gingham just to dress him up a little. No tutorial of course because you all know my disdain for tutorials that have been done a billion times before or are so simple they are just not required, but I did consult this tutorial by Prudent Baby for the dimensions although I made mine with just some hat elastic for the neckband instead of a fabric band and proper bow tie clip:

diy-easy-toddler-bow-tie

diy-easy-toddler-bow-tie

Amazingly he kept both the bow tie and some matching red suspenders I found in an op shop ages ago all day, and I might be biased here but I think he looks pretty damn cute!


diy-easy-toddler-bow-tie

diy-easy-toddler-bow-tie

There's no mistaking that my two are siblings is there? Even with Toby weirdly having red hair.....

Today I went to the Australian Sewing Guild industry day at the Simplicity patterns headquarters here in Sydney. As much as I would like to say it was like being on hallowed turf being in a large building surrounded by thousands of sewing patterns, it was really just a standard big warehouse with boxes stacked on pallets! But they did have some big tables with loads of patterns out for $2 or $5, boxes of trims, sewing notions and other bits and pieces, so of course I couldn't help myself but buy some things despite having no intentions to do so.  I picked up these patterns for $2 each:


and these 5 reels of trim for only $2 - a total bargain!


Plus the day was very interesting and informative as usual, aside from learning loads more about how to sew successfully with knits there was an amazing talk by Yvonne Twining who does amazing things with leather, including making very beautiful bags and her own shoes. If I could make my own shoes I'd be in absolute heaven. Anyone in Australia who hasn't heard of the Australian Sewing Guild should definitely check them out - they offer loads of interesting talks, courses, fabric shopping trips and the like.  Plus their regular sewing days are a great chance to meet up with like minded sewing fiends, it's totally not a bunch of ladies sitting around doing hand smocking or patchwork quilting like I erroneously thought it was!

And now I need to go and ponder my wardrobe to figure what to wear to our Sydney sewists high tea tomorrow. The weather forecast for heavy rain and wind is a bit frock unfriendly, so I'll have to dig out some tights and a coat to accessorise.

Last call for drinks: Sydney Sewists High Tea

Friday, 14 June 2013
Sunday 23 June is rapidly approaching and a lovely group of 18 ladies have confirmed their attendance at the High Tea, including SewBusyLizzie who has only recently returned from an amazing overseas holiday and is now going to travel some 4 hours from the north coast to join us! So clearly you can tell this is one event you don't want to have FOMO over ('fear of missing out for those of us that speak proper, non-teenage English).

But it's not too late to join us - I'll be confirming the final numbers and paying for our group on Tuesday, so if you'd like to come email me at Kristy_Idle"at"hotmail.com and I'll send you payment details straight away. 

If you can't commit, but somehow find yourself with a few free hours on that Sunday you could always take a chance that there's spare capacity at the restaurant and come along anyway, but I would check first with the club whether there's any space during that sitting. I don't know how busy it gets there on a Sunday afternoon in June but you never know your luck.

As a reminder here are the details:
What: Sydney Sewists High Tea - all welcome!
When: Sunday 23 June 1.30pm
Where: Level Fourteen, The American Club, 131 Macquarie St Sydney (the Circular Quay end)
Cost: $47 p.p

And the lovely Christie from littlebettydesigns has suggested we have an informal swap on the day, so if you have a piece of fabric or patterns or even some haberdashery notions that you no longer want or need in your stash bring it along and you might even go home with some new goodies even though we aren't even fabric shopping!

As for me I've done no sewing at all this week, having been in bed since last Saturday terribly sick with strep throat and the worse headache I've ever experienced in my life. At first I thought I just had tonsillitis again and was self medicating with some penicillin leftover from the last bout of tonsillitis I had, and I only visited the doctor to get a medical certificate. But lucky I did because apparently strep throat can get very serious if not treated with the correct antibiotics, and the doctor gave me some nice heavy duty drugs to help me get through the worse of it. I think I'm ok now (fingers crossed) although I do feel weary - any migraine sufferer would know the feeling of heavy eyes and tiredness that you feel after a migraine finally lifts.

But the good news is that I gave the pyjamas pants from the last post a thorough testing and I can confirm they are perfect pj pants. The slim cut of the leg meant they didn't bunch up at the knees as soon as I slid between the sheets, and the drawstring waist is snug enough that when you roll over your pants don't get all twisted and uncomfortable. Or is it only me that this happens to?

I don't like to post without a photo, and lucky for you all my mum has obligingly found the photo of my sister and I wearing our matching strawberry shortcake outfits.  So for your viewing pleasure and at the risk of damaging my highly cultivated fashionable persona, here it is (that's me on Santa's left):


Now I know there'll be a pin it button next to this photo, but please NO ONE pin this please please please!

Kwik Sew 3125 - matchy matchy

Thursday, 6 June 2013
When I was growing up the thing I hated with a passion was being dressed the same as my sister. Now that I have kids of my own I can sort of understand why, because in the interests of peace and any semblance of quiet you must treat each equally because inevitably what one has the other will want. But at the time I hated it, especially since my sister was 3 years younger than me. I wish I could find the photo of us wearing matching strawberry shortcake short and tshirt set, but you'll just have to take my word for it that it was way too much matching and way too much sickly pink and just plain wrong!

Having kids of different genders has made it easier, but I've gone out of my way not to make them matching clothes (fabrics or styles) or matching with me either. So you can imagine my surprise when Anna demanded a jumper (sweater) to match the one I had just made her little brother. Deep from the stash I made a simple raglan sleeved jumper for Toby from Kwik Sew 3150 in a grey marle fleece with a Dalmatian and fire truck print that I picked up in a garage sale eons ago:

kwik-sew-3150-toddler-fleece-jumper

I made Toby's version with a red ribbing also from the stash for the cuffs, neckband and waistband. I used size T1, but I find that it's very snug and he probably won't be able to wear it for much longer - wasn't I just ranting recently how big the commercial sewing patterns sizing is? Well it appears Kwik Sew is different.....

Kwik-Sew-3150-toddler-fleece-jumper
 
Kwik-Sew-3150-toddler-fleece-jumper
 
I had a bit of fabric left over that I was going to make a second jumper for Toby in a bigger size but Anna demanded one too, so using the same pattern but in size T4 I made her the same jumper, just without the rib hem band:

Kwik-Sew-3150-toddler-fleece-jumper

kwik-sew-3150-toddler-fleece-jumper

Ordinarily I wouldn't sew something like tracksuits when they are so cheap to buy and kids destroy them or grow out of them before you know it. Plus fleece fabric is surprisingly expensive given that you're not making it into something high end out of it. But since I do have the fabrics in the stash and they don't take that long to make it's silly not to make them - it's not like the fabric is worth holding onto forever.
 

kwik-sew-3150-toddler-fleece-jumper
 
I only wish I had enough fabric to make their dad a matching jumper too. Trying to embarrass him is fast becoming my favourite pastime!
 
kwik-sew-3150-toddler-fleece-jumper


May Burda: winners and losers

Monday, 3 June 2013
June already?! Really, the year is just flying by. I bet all of you that did MMM must be breathing a sigh of relief that May is over with, congrats to all you for completing it.

I did manage to finish my May Burda project last Thursday when it was still May, but I'm only getting around to posting it up today so technically I'm still on track with my self imposed Burda challenge (sew at least one item from the mag during it's month of issue).  It was a bit of a struggle again this month to pick a project, not because it was all bad but because this is a summer issue and we're now in the depths of our winter.  There were some pretty dresses and a cute short sleeved peplum jacket and then weirdly this long sleeved, high necked blouse (5/2013 #106)  made in a stretch satin:

burda-5-2013-#106-blouse

It seems rather out of place in a summer issue doesn't it? But since we're having cool weather and I quite like an interesting high neckline I thought I would give it a try.  There was no review on Pattern Review for this one, but there was a lovely version made by a Russian lady shown on the Burda Russian site - although of course I couldn't quite understand what she thought about the pattern even with google translate.

I figured this would be shapeless and baggy since it doesn't have any darts or shaping, but I thought that if the neckline turned out well I would convert that centre front seam into an opening button-up placket and put some vertical darts in front and back to give it some shape.  But I didn't get that far because this project turned out to be a bit of a fail - that neckline sure is interesting but in an eye brow raised kind of hmmmm way....

Burda-5-2013-#106-blouse

I should have looked more closely at the technical drawing because what I thought was actually a high stand up collar with an interesting twist at the front, much like a pussy bow blouse, is actually just an extension of the left side front that wraps around the neck like a scarf which is held in place with a couple of snaps.  At least I think that's how it works, the instructions made no sense at all to me. The collar is not attached at the back neckline at all, and when I was wearing this version around in my sewing room I kept feeling the need to pull the collar down at the back.

Burda-5-2013-#106-blouse

I think I'd rather just sew a normal shirt and wear a scarf than deal with this complicated mess!  And of course, as I predicted the rest of it was a shapeless mess, too tight at the hips, too loose at the waist and bust.  The shiny satin fabric (from the stash) didn't help things either, so I didn't bother putting sleeves on this one - it's gone straight to the bin.

Burda-5-2013-#106-blouse

I could have left it at that because technically I did use a pattern out of the May issue, but it just so happens that I needed some new pyjama pants and there was pattern 5/2013 #117A looking every bit like pyjama pants even if the model is wearing a blazer and heels with her silk satin floral pants!

Burda-5-2013-#117A-pants

Using a floral cotton voile from the stash, bought several years ago from Spotlight on sale if I remember correctly, I managed to make these pants in about 2 hours max including tracing the pattern which is the most tedious bit.  I quite like the fabric (they are pyjama pants after all) although my husband thinks they look hilariously ugly.

Burda-5-2013-#117A-pants


Burda-5-2013-#117A-pants

No photos of me wearing them though, I'm sure none of you need to see me in my jarmies! They are such a simple thing to make, being just straight legged pants with a drawstring waist but surprisingly they are the illustrated pattern course in the magazine - further proof to me that Burda is focused more on the beginner sewists in my opinion.

The slim legs and side pockets differentiate this pattern from other pyjama pants patterns I have, although I don't particularly like the waistband treatment.  The top of the pants are merely folded down twice to make a casing with the raw edge enclosed which means that the pocket facing and hip piece are also folded over twice which makes the waistband a bit bulky and quite fiddly to push the waistband tie through as well.  If I were to make these again I think I would draft a separate waistband piece - it's not that much more effort to cut out and sew on a rectangular waistband to create a drawstring casing.

The waistband on the outside:
Burda-5-2013-#117A-pants

The waistband on the inside:
Burda-5-2013-#117A-pants

So happily I did get something useful out of this issue and next summer I may even make the vintage sheath dress pattern too as it's quite cute. Now I'm waiting for the June issue to land in my letterbox to see what this month's challenge will be - normally the issue arrives a few days before the start of the month so it's unusually slow this month. 

Lining the Style Arc Marni

Tuesday, 28 May 2013
I sewed a lining into the jacket I showed you in the last post, and thanks to the feedback from all the lovely ladies at the ASG sewing group at Rhodes on Saturday I've decided that this jacket is completed and is good enough to wear - a great outcome for what was essentially a test version. 

I travelled into work this morning with my husband and I forced him take some photos for me next to an old sandstone building near our offices, so you all get a different background than my usual lounge room. I wore it today with a black dress I'd made pre-blogging days (Vogue 8280), so it's too bad I'm not doing MMM because I nailed it today.  The jacket was very comfortable and kept me warm on a chilly day and it wore so much better with a lining as it didn't catch on my clothes at all. It does need some slight fitting adjustments for the next version - mainly a forward shoulder adjustment and a bit more interfacing, but overall this one is still pretty good.


excuse those squinty eyes - it was early morning and I'm soooo tired!
For the closure I decided to sew a loop from some black hat elastic into one side and sewed on a button which was much easier than fiddling with a buttonhole or doing a covered snap:


It also looks much better on the inside having a lining covering up all those seams:


Making a lining for it wasn't that difficult either, and whilst I don't particular like doing tutorials since I'm not an expert in these things (my pet hate is newbie sewists doing tutorials on their blogs) I will share how I did here partly because BeaJay asked me on Saturday but mainly so that when I go to do this again I remember exactly how I did it!

First up the fabric - back in 2011 when I wondered what fabric to use to line this New Look 6000 dress I made from ponte, a few people suggested a stretch knit fabric so I picked up a roll of black stretch knit from the Remnant Warehouse on one of their two for one rolls Tuesday, which has a soft, slippery hand almost like fabric you would use for a slip. I still haven't lined that purple ponte dress yet, but the fabric is perfect for lining this jacket.  It does have more stretch to it than the ponte I used for the outer fabric, but I figured that would be fine.

Next the pattern pieces - for the lining I used the side front, sleeve, back peplum and back pattern pieces as drafted.  I didn't add a pleat to the back pattern piece for wearing ease that you would normally see in a jacket at the neckline because I made the lining from stretch fabric.  I drafted new pattern pieces for the front and front peplum.

For the jacket front lining pattern piece, I laid the front facing piece over the jacket front piece and traced off a new pattern piece, remembering to add a seam allowance and rounding off the pointy corner bit because that was designed to be sewn down to the shoulder seam which now isn't needed because it's going to be sewn to the lining instead: 


neckline as per the pattern drafting


neckline when rounded off for the lining

For the front peplum lining pattern piece I made a new pattern piece by folding over the centre front facing bit and folding the dart over too and added a seam allowance to the centre front, so that I had a pattern piece that was the same shape but much narrower.


Finally the construction order - I sewed all the lining pieces together, and then sewed the lining to the jacket at the collar/centre front and the sleeves ends (not the cuffs).  Then I hemmed the jacket (2cm deep) and lining (3cm deep) separately to each other so that the lining would hang freely which I figured was the best way to deal with the pleated fabric at the front. 


I sewed the lining to the jacket on the inside along the waist seam allowance just to anchor the lining in place and so it wouldn't twist around when being worn. Then I sewed the cuffs back on, not bothering to sandwich the raw edges in the middle of the cuff layer because it won't be visible and I was feeling lazy, but next time I probably would just to make it look better.

And that's all it took - pretty easy really and I still can't understand why the pattern didn't include a lining.

Style Arc Marni - the first attempt

Thursday, 23 May 2013
I really, really wanted this pattern to work because it has so many things I like in a jacket - a shawl collar which is not just easier to sew than a notched collar but is also a more feminine look when worn with a dress or a top, princess seams and a waist seam which really helps in getting a close fit especially for a sway back and three quarter sleeves with turned up cuffs which might give you cold wrists but makes you look like you're ready to get stuck into work.  Plus the name of the pattern has a hold on me - if Toby was born a girl he would have been called Marnie after the title character in a book I read as a child but still vividly remember even though it's been more than 20 years since I last read it - When Marnie was There by Joan G Robinson.  The other character in that book is called Anna, so it would have turned out nicely except Toby decided to come out a boy!

Thankfully my first attempt at the Style Arc Marni has turned out brilliantly!


I made this as a hopefully wearable test version from some cheap, rather thin ponti bought from Spotlight two years ago during one of their very frequent sales.  I had intended to make a stretchy dress from it whilst I pregnant with Toby but never got around to it which left me with 3m of this in the stash.  For this version I've made no changes whatsoever to the pattern pieces - just cut them out and sewed them up exactly according to the pattern. As you can see from the photo above I haven't added a closure to the front yet and nor have I hemmed the peplum, but overall I think the fit is pretty good and I need only make small changes for the final version.  There is  a bit of excess fabric at the front near the armhole which I think is caused by my forward rounded shoulders, so I need to pinch a bit out there and maybe take in a little along the princess seam at the bust, but otherwise not too bad.

What I like about this pattern:
  • as others have noted about Style Arc patterns, the drafting is spot on. All the notches lined up exactly, and the individual pieces fit together properly, without any one bit being too short or too long in comparison with the piece it is to be sewn too.
  • the jacket turned out looking exactly as the diagram and there was no surprise or shock at the finished garment as can (and does often) happens with a pattern that only comes with an illustration and not a photo of the finished pattern on the envelope! It looks good with a belt as illustrated and turned up cuffs:

  •  the fit is excellent as there isn't any crazy amount of excess ease as there usually is with commercial patterns. The Style Arc pattern has turned out to be more like RTW than nearly any other jacket I've made using commercial patterns. Having a waist seam with darts at the back means I was able to get a very close fit:


  • the pattern is printed on durable white paper instead of thin, too easily torn tissue paper. Yes it means it's harder to pin to the fabric and make fitting adjustments but for an expensive pattern at least it's not going to fall apart any time soon. 
What I don't like about this pattern:
  • The jacket is unlined.  I think this jacket is intended to be a softly draping unstructured jacket, and no one else has seemed to complain about this, but I just found that the jacket clung really badly to the clothes underneath and I had to keep readjusting it every time I moved.  You can see the drag lines in a few photos above. It's also really hard to slide my arm into it when I was wearing sleeves underneath because the fabric kept bunching.  I just think that unlined jackets should only be made out of stiff fabrics just denim or heavy drill.  Plus the inside looks really messy without a lining to cover up the seams and stabilising tape along the shoulder seam.  Sure I could have bound each of those seams with bias binding which a more meticulous and patient sewist would do, but I prefer to take the easy route and just to cover them up with a lining.  So my next attempt will be to draft a lining for this jacket.
 

  • Too little is interfacing suggested. The pattern calls for only the collar facing to be interfaced, which I'd say is because it's unlined and you'd be able to see any other interfacing used in the jacket.  I did interface the cuffs with some whisperweft which gave them more substance when folded up, but I wish I used some more especially around the shoulders as the sleeve head seems to have collapsed. The next version I make which will have a lining I will add some interfacing to the jacket in the same manner I would for a tailored jacket.
  • The instructions are super sparse and was a bit confusing in parts - for example the notch in the cuff lines up with sleeve seam, and not another notch.  Luckily there was a diagram to indicate how to do the cuffs because I don't think I would have worked them out at all. I've made a few shawl collar jackets before so I knew how the collar attaches, but I think if you were a beginner sewist the lack of instructions and diagrams for the rest of the jacket would make this a semi challenging project.
  • Changes in the seam allowances. This pattern uses what I understand is the industry standard of 1cm (3/8 in) seam allowance instead of the overly generous 1.5cm (5/8 in) that the other commercial patterns use.  Whilst I do like having that extra fitting room in the seam allowance when I'm making dresses or pants, I was fine to use the different seam allowance on this jacket.  Except the pattern requires an even narrower seam allowance of 6mm just for the internal seam of the collar and the seam along the slit in the cuff. Which of course I forgot to do - unpicking stitches in knit fabrics is so tedious - yes I should have paid more attention when I was sewing but I'm so used to just sitting down and sewing all the seams at the same width!
  • Single size pattern - maybe I've been using the Big 4 patterns for too long but I am just so used to getting a range of sizes in the one pattern which is really helpful for easily grading up or down between sizes as required, plus having the option to sew a different size if you wanted to make the pattern for someone else.  It's not really a problem for me on this jacket because it did fit, but it would make me think twice about ordering a Style Arc pattern for a dress or pants where I do need to grade between 3 different sizes for my  bust, waist and hips.
Hmmm, it seems I am being a bit critical aren't I? That list of things above of the things I didn't like are really quite minor issues and overall I really like this pattern.  I will try out a lining in the jacket which hopefully turns out well so I can wear this version because it goes so well with this red dress I made recently.  I'll also definitely make this in the lovely blueberry ponte I have left over from this dress that I bought from Tessuti's at the first Sydney sewists meetup last year. 

Speaking of the Sydney sewists meetup it's not too late to RSVP for our next event on Sunday June 23 - High Tea at the American Club in Sydney - the more the merrier I say!