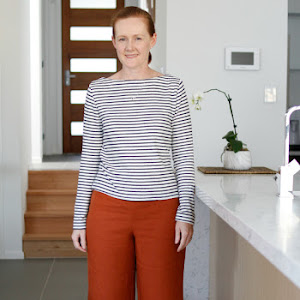
easter roundup

Wednesday, 27 April 2011
Hi everyone, hope you all had a lovely easter and didn't consume too many easter eggs.  We had a great time camping, in fact Anna is still talking about "camping in the bush" so I guess that is a good sign.  It didn't rain at all where we were, but it was a bit chilly so there was a bit of warming our hands by the fire


eating some easter eggs (well an Easter Bilby in this case)


a bit of fishing with dad (without catching anything though)


photographing our friend's dogs and generally running riot with the furry ones (there were three dogs there much to Anna's delight!)


and playing house in the tent!


But the best way to top off a weekend away is a day at home all by myself! Thanks to the wonders of being a government employee, I took today off work using my accrued excess time while my husband went to work and Anna went to daycare. And it was bliss - the only problem I had was choosing what to do on this very rare day to myself.

I spent the morning doing many loads of washing, as well as tracing out some Burda patterns since there were no little hands tugging on the tracing pattern and asking repeatedly "what are you doing mummy?" - it made the task a little bit easier! These are what I traced:

Jacket 116 from Burda 4/2009 to make in a stretch dark denim.
Skirt 113 from Burda 1/2011, probably in a grey glen plaid check wool, just like the magazine photo.

Jacket 126 from Burda 9/2010, possibly in black wool crepe to match the tulip skirt from a few posts ago.

Top 121 from Burda 9/2010, which is a big call for me because I don't really have too many knit fabrics in my stash to sew it from and nor are knit fabrics and I the best of friends, so we shall see.


After a cup of tea and time to uncross my eyes after tracing all those out, I got to work on the denim jacket for a few hours before the whirlwind came home from daycare.  And here is the progress so far:


The bodice is all sewn together and topstitched, all that is needed are the sleeves, hem and buttons.  It's actually a pretty straightforward pattern despite having 15 pattern pieces, and about six million kilometres of topstitching.  However, I seem to have run into a little problem -  have a closer look at that collar:


The collar sits much closer to the centre front on one than the other, despite the fact I matched up all the notches so I have no idea what I've done there.  Now I'm in for a bout of unstitching and head scratching to figure out how to fix this - luckily there are still some easter eggs hanging around to help me on that journey.......

like losing my right arm.....

Wednesday, 20 April 2011
ok, I'm being a touch melodramatic but I left my camera at my parents house over the weekend and now I feel lost without it! It's funny that pre-blogging and pre-child I only used to get the camera out if it was a special occasion or I was going somewhere, but these days I take photos pretty much every single day now.  It probably explains why I have more than 10,000 photos of Anna and she's only 27 months old..... I've also never had so many photos of myself either, although most of the photos of me aren't of me doing exciting things or in exciting places - just me in my lounge room awkwardly posing in my latest creation.  I'm sure you all understand and have the same photos too.

Anyway all this babble is aimed at setting up an excuse for the following very ordinary photos, I had to resort to my little automatic camera which has copped some battering since I let Anna play with it to keep her away from my DSLR.  She has surprisingly snapped a few randomly good photos though - maybe I have a little Annie Liebovitz in the making?

Not that I've done much sewing to photograph, I've been alternating between being really busy and being really tired but after doing a wardrobe clean out of my little beanpole I realise that nearly all of her clothes are now too short, and since it's getting cold around here sending her to day care in three quarter pants or mini dresses just wasn't going to work.  So I made her a little shift dress from a brand new still in it's packet 1970s pillowcase, that is a good thick polished cotton and will look awesome paired with a long sleeved top and some tights:


I just cannot imagine what sort of bedroom decor someone would have for this vivid purple, black and blue pillowcase to be a good choice, but it makes a bright child's dress.  No photo yet of Anna wearing it, but it got her seal of approval because she ran around with it saying "oooooh pretty".


Next up I made her some jeans in dark denim left over from a denim skirt I made last year.  That's what I love about little kids clothes, you can eek them out of the smallest bits of fabric, not that it's made a real dent in my scrap basket yet! 

I used Kwik Sew 2216, which is OOP, just because I've made these several times before and I knew which size fit Anna.  In fact I think the first time I used this pattern was about this time last year, how's that for symmetry! This is an older pattern (1980s?), so it has a bit of room around the butt for bulky nappies, is a bit high waisted and has surprisingly skinny legs for a kids pattern:


I top stitched in certain areas using the triple stitch feature with a traditional orange/brown thread which resulted in a satisfying store bought look.  The orange snap instead of a button isn't the greatest look, but a button is too fiddly to do up on squirmy Anna, and those hammer in metal snaps drive me bonkers! I also made the legs extra long so that she could wear them with turned up cuffs, which seems to be what all the cool kids are doing these days:


The only thing I've noticed with kids jeans, and the Ottobre pattern I used recently did this too, is that the yoke and back pockets sit really low, right down the backs of their legs.  I guess their little butts just aren't big enough for those to sit on their backsides like adult jeans.

Not a very exciting blog post today I'm afraid, but better than blog silence.  I don't want to leave my blog quiet for a few weeks in case I lose all of my wonderful followers, but also in case I run out of steam and never return.  And I don't want that - I love having connections with fellow sewists all around the world, and I certainly value each and every comment you all leave me.

And now I have to go and sew some tracksuit pants for Anna because we're going camping this weekend and it's going to be very cold.  And I mean real camping too, none of this powered cabins in a tourist park but honest to goodness tents in the bush with no showers, toilets or electricity! Luckily we're going with my parents who have a fully kitted out campervan and we're going to the same spot we've been camping at since my sister was 6 months old, which is a good 30 years ago now.  But still, it's going to be interesting getting Anna to sleep in a tent. Wish me luck!

One last thing - no more mention of the failed dress please people! It's annoyed me so much I've already ripped out the invisible zip for re-use in another project and the fabric is in the scrap bag - maybe I'll make Anna a mini corporate dress one day from it!

when things turn out even better than expected

Thursday, 14 April 2011
 After that last project failure I decided I wanted something not only quick and easy to make, but also something that would actually work out! So I started out by taking up the hems of two pairs of jeans that I've had sitting in my mending pile for at least a year now.  Isn't that terrible? In the time it's taken me to sit down and hem them I've made god knows how many complete outfits from start to finish, yet it's taken me this long to spare the 10 minutes it took to cut and hem my jeans!

But still feeling a little worn out and wary of another failure, I decided to make a simple skirt.  I really want to expand my smart casual wardrobe, so I don't just always wear jeans and a nice top when I go to the movies or out for a coffee but it really is a big hole in my wardrobe at the moment.  I settled on my fast becoming favourite shape, the tulip skirt from Burda 9/2007, skirt 116:


I really like this shape because it looks less like office wear than a pencil skirt, but a little different to a plain a-line skirt too.  Plus it is surprisingly flattering even though it has extra fabric around the hip line, which I suspect comes from emphasising the waistline.  And since I've made this before, I knew it would fit so it was a winner on all counts.

This time I've made it from black wool crepe, lined in black bemburg:


Handily it has pockets too, so I can stand around looking too cool for school:


And so even though I just wanted a skirt to wear in casual situations, the wool crepe fabric has made this skirt look really quite good so now I'm thinking of making a cute cropped jacket to go with it from the same fabric so I have a funky skirt suit as well. 

The fabric was a total bargain too - I bought a huge length of it from a garage sale for a couple of dollars, but when I got it home and opened it up I realised that there were moth holes along one edge of it.  This fabric is very wide, so I just cut off the ruined part and washed the rest of the fabric in a warm cycle in the machine.  Normally I would treat wool crepe with more care, but since this was cheap and almost ruined anyway I took a risk.  It only felted up a little but didn't lose too much of its drape so no harm at all.  I did keep the fabric in a big zip lock plastic bag though in case there were still moths or eggs in it, because I didn't want to infect the rest of my fabric.

So all in all, the fabric and the skirt turned out better than I had planned.  Now I just need some cute tops to go with it, which is another big hole in my wardrobe!

Thanks for all your commiserations re my last failed dress project.  It was my first Project Runway pattern, so not an auspicious start but I am contemplating making another Project Runway pattern but this time a girls dress for Anna, so hopefully that turns out better.  And to assure you Gail that this dress is too small, this is as far I can get the zipper up:


Beyond saving I'm afraid!

project failure: Simplicity 2337

Thursday, 7 April 2011
After two fitting toiles and a week of blog silence I bet you were all expecting to see me back with an awesome finished dress right? Sadly I've committed a basic and unfixable stuff up and the dress is now a monumental project failure. It seems that when I transferred the pattern alterations from the fitting toile to the paper pattern I forgot to add seam allowances, meaning that this dress has turned out to be way too small. Even super duper spanx won't help me squeeze into this one. Sigh..... I guess I should have made a third fitting toile instead of being cavalier and jumping right into it. The problem with using the good method for lining a sleeveless sheath dress is that you can't really try on the dress until the very end, because the side seams and zipper are sewn practially last.

And I really dragged my feet on this one too. For some reason my enthusiasm waned quite early on in this project, and I really had to force myself to finish it since 'no new UFOs' is my mantra now. There were several times when I dragged myself into my sewing room that I found myself cleaning up, laying out fabric for future projects and pulling apart another garment for refashioning instead of sewing this dress - all helpful but nonetheless procrastination.

Here's the pattern, Simplicity 2337:Here it is, on but not zipped up fully (not pressed and with the lining half hanging out): Luckily this fabric was a total bargain - I picked it up for $1/m during the after Christmas sales at the Spotlight near my inlaws house in Ipswich, and then a few weeks later I saw it at full price for $14.95/m at my local Spotlight here in Sydney! It's just a polyester blend fabric, but it's a nice dark charcoal colour in a fine herringbone pattern and had a lovely drape. I suppose I could go back to Spotlight and track down some more of this fabric. This pattern had so much potential, but it won't be realised for a long long time because I've completely lost energy for this pattern and am moving on.

But for everyone else who may be contemplating this pattern, I'll give you my two cents worth anyway. Firstly I have to say all the problems with this pattern were my own doing: I stupidly bought the pattern size to fit my hips (sz12 - 20) and not the smaller pattern size that would have fit my bust. It's much easier to add extra room to the hip and thigh area than it is to grade down several sizes at the bust, especially for a pattern like this one that has a complicated bust area.

The good:
- the finished dress measurements are included on the pattern at the bust, waist and hip points which is very useful because it saves having to do a flat pattern measurement.

- Instructions for an invisible zip are included instead of the usual centred zipper. I always use invisible zips when making dresses or skirts because it looks neater so I didn't really need the instructions, but for beginner sewists using this pattern it would be helpful.

- I like how it offers different sleeve options and variations to the front of the dress, you could easily make several very different dresses out of this one pattern.

The bad:
- this dress has so much ease that if you sewed the size for your body measurements that the dress would be rather loose fitting. Maybe it's just me liking my dresses to be close fitting, but I think that ease of 7.5cm at the bust, 10cm at the waist and 11.5cm at the hips is a lot of ease!

- the dress is unlined which I don't think is ideal for a structured dress like this . But having inserted a lining into my too small but awesome dress, it was really tricky and a bit messy to line due to the cross over panel at the front, so perhaps it was too difficult and beyond the scope of this pattern to include instructions for a lining.

- the pattern instructions are a bit lacking in parts. Some parts are missing completely:
I held the paper up to the light to see if step 6 was written in invisible ink, but no, it was just left out! Not that I followed the instructions since I was changed the order completely to insert the lining, but it may confuse/annoy beginner sewists using this pattern.

- the 'designer' touches are a little naff, but I suppose might appeal to some. - the instructions for finishing the back vent are a little basic and messy looking for an unlined dress, would it have been that difficult to include instructions for a mitred hem? No offence to anyone who uses the method below to do their vents and hems, I did it this way for a long time before realising that a mitred hem isn't that much more effort but looks a millions time better.

- the pleated sleeve version that I made looks a little floppy and somewhat silly. Perhaps if I interfaced the fabric or used a stiffer fabric it might have been better.

For anyone else making this dress who also wants to line it, I'll share how I did it because it took me ages to figure it out (not that this is necessarily the best way to do it though):I made the lining from the pattern pieces, and sewed the front pleated panel and the lining together at the neckline right sides together and then turned in which eliminated the need for a facing. I also sewed the left front panel (the smaller triangle bit) to the lining at the neck edge right sides together and turned in, again eliminating the need for a facing on that piece too.

Then the tricky bit - I sewed the front pleated piece (fabric and lining) to the side piece fabric only and the left front panel fabric only to the bottom of the left front panel. Essentially this wedges the front pleated panel into the princess seam of the dress. And then I sewed the lining of the left front panel to the lining of the side panel to the bottom of the left front panel. And then I sewed the front panel lining to the side panel lining together as normal below the left front panel. Whilst it left a little hole like this at the bottom of the left front panel: when that left front panel is laid across the dress it covers up the hole completely. Now if you imagine that raw edge is actually wedged between the princess seam of the lining, the entire front dress is lined with only the bottom edge of the left front panel still visible in raw form, although I overlocked that bit. For comparison, if you chose not to line the dress and instead face the neck edges this is what it would look like:
I'm thinking those instructions are as clear as mud! If anyone is making this dress and would like a bit more detailed and possibly clearer instructions, just email me. So now I'm contemplating what to make next. I want to start on the Vogue skirt suit from a few posts back (the one with the back peplum and bell sleeves) but I think I'll do something simple first to cleanse the palate and get my mojo back. Maybe even something in black so I don't have to change the thread in my overlocker yet. See, I'm even procrastinating on doing that!

But to finish on a good note, I completely forgot to thank Mary Collins for awarding me a Stylish Blogger award a few posts back - so thank you! I really like how Mary has listed all of her UFOs on her blog (nearly as many as me!), maybe I should do the same because then I might be motivated to finish them......

small diversions

Monday, 28 March 2011


Oh you guys are too funny - all that love for that fabric I so boldly declared to be ugly! Maybe my photos didn't convey how the colours match the colour of boogers and baby poo (sorry for being coarse). But a big part of the overall horribleness of the fabric is it's feel - it's a nasty polyester that has a scratchy feel, wrinkles if you look at it the wrong way and was so slippy and slidey it was difficult to sew with.

Anyway the dress is looking promising fitting wise, but I haven't progressed much further than cutting out all the pieces. Sadly I backed up my tonsillitis last week with another stomach bug over the weekend, so energy levels and enthusiasm for getting off the lounge have been rather low I must say.

I did manage to eek some sewing time in over the last week though to make some pants for Anna. It seems that Anna has sprung up another two inches overnight because all of her jeans and pants are now three quarter length, so what better reason than to use one of the Ottobre magazines I bought recently? I made the bootleg jeans from Ottobre 6/2010:


and what everyone says about Ottobre is so correct, the fit on these are much better than those I've made from the Big 4 pattern companies. The waistband sits near the waist, and not under the armpits, and the fit is trim and not too baggy. I liked these so much that I made three pairs! First up a pair of boring plain black corduroy ones which will be a good staple in the wardrobe of a messy little girl:

These are straight off the clothes line, hence the peg marks on the legs.


And then I made a pair in brown corduroy with purple polka dots. Seriously, at what other age could you wear polka dot pants and not look a little nutty?


Plus it's a good match for our dog, and you all know how much I love to be matchy matchy!


And for the third pair I refashioned them from a pair of wool/poly blend pants that someone gave to me that never fitted correctly, so instead of trying to alter them to fit me it was much easier just to cut them down to make a little bitty pair of pants instead. For these ones though I left off the back patch pocket, and bound the pocket edge with grosgrain ribbon to make them look a little dressier:


They were perfect to wear slouching around at the Australian Museum:


and for getting soaked in while 'feeling' the falling water!


I managed to make these quite quickly, probably about 1.5 hours for each start to finish. I took a shortcut by leaving off the fly shield - it's a nice detail but a little fiddly and not really necessary for kids pants. Also it makes things go quickly when you're not trying to fit around adult curves and solve the multitude of trouser fitting problems. However I did put some elastic in at the back waist to get a closer fit, especially as we have started toilet training and can hopefully get rid of the nappies soon.


I also made them extra long so I can let down the hem in case she keeps growing the way she has been. Someone told me once that the height a child is at two is half their adult height - Anna was about 90cm at her second birthday which means she'll be 1.8m/almost 6ft!. Not quite as tall as her dad but much taller than her mum....


ps. Samina - my wedding ring is back on my finger, I just try not to think about where it's been!

the UGLIEST fabric you've ever seen

Saturday, 19 March 2011
I proclaim that blog title as a fact, not a question. I apologise for what I'm about to do to your retinas, but Lizzie asked me in the comments to the last post to share how I make muslins (aka a toile.)

First step is to find a fabric from my stash that I won't ever wear in public but is similar in fabric content, weight and drape to the fabric I plan to use for the final garment. And this fabric certainly fits the bill:

In my defence though, I often buy fabric in bulk lots either from the op shop or garage sales and that's how I end up with gems like these in the stash. But since I'm a hoarder (albeit an organised one and not out of control yet), I never throw any out, no matter what level of ugliness it is. But clearly even ugly fabric comes in handy sometimes!

Now I'm not a professional dress maker, and despite the amount of muslins I've been making recently I don't even make them all that often really. So this ain't a professional tutorial, I'm just sharing with you what I do.

After picking the right fabric, I tend to make the first muslin straight off the pattern with just a few alterations to the pattern that I always make such as a sway back alteration and a narrow shoulder adjustment. I don't bother with interfacing or facings although I do fold under the finished edge 1.5cm so that the finished neckline isn't lower than thought at the end (yeah I learnt that one the hard way). I put both sleeves in too, because getting a good fit around the arms and shoulders is important to me. And now that I've discovered that I have one shoulder lower than the other I now realise why the fit on both shoulders always turned out differently!

And then while I'm wearing the garment, standing in front of the mirror, I basically pinch and tuck and fold and pin the garment to my desired fit, and draw on the garment where I need to take it out (usually around the hip). Literally, like this:


And then I unpick all the seams, transfer the changes to the pattern or make a new pattern piece if it's too different. I've read some pattern making books that recommend using the muslin pieces as the actual pattern which makes sense if you're making something once, but since I want to get rid of the ugly fabric eventually but keep the modified pattern for future usage, I just make the changes to the pattern paper and stick a post it note in the envelope of the changes I made.

If I'm lucky there's not too many changes after the first muslin and I'll then take my chances and go on to make the final version. This dress however needed lots of reworking, to the side panel alone I've reduced the side seam quite a lot, pinched a little excess out of curve of the princess seam, as well as reducing the width of the front panel and the back panel too!

So I'm now onto my second muslin for this one, but it's looking promising. I'm so looking forward to finishing the muslin for this one and binning that ugly fabric - it's depressing sewing with it!

Sorry for the short and rather lame post, as I said I'm not an expert on this so I don't have too much to say about the topic. I just do what works for me, even if it rather unorthodox (or slipshod). Plus I'm convalescing at this point in time, I have another bout of tonsillitis. First one for this year, but after the five bouts last year I wasn't too keen to see it come back so early! My doctor says one more bout and she'll recommend I have them removed which sounds really painful but could also mean a week of ice cream yay!

Pattern gorging

Tuesday, 15 March 2011
Wow, I'm glad you all liked my fuchsia dress as much as I do! It makes a nice change from the usual lovely but oh so serious style of work dress that I usually wear. I did wear it to work this week with stockings and a blazer but since I didn't line the skirt portion of dress it stuck to my legs and rode up a bit. I'll have to invest in a half slip (can you still buy those?) or make a full lining for it.

My Vogue patterns finally turned up in the post yesterday, I'm so glad they didn't get lost in the system. I did notice the postage cost on the envelope was only $5.44US, so Sewing Dragon they made money out of me too, or at least they certainly charged a lot for handling.....

Because it was $15 postage for 1-3 patterns and they were on sale for $3.99, of course I bought 3 patterns, which are:

Vogue 8543, the skirt suit which you've already seen. I plan to make this out of a light grey textured wool flannel. I know, I know, I'm reverting back to grey but I swear I have just the right fabric in the stash that I want to use for this suit and that's why! Plus I think a light grey colour is a good neutral base for wearing it with vivid blouses and scarves.


Vogue 1156, which is an Anne Klein dress that is quite simple but I like those radiating pleats from the neckline (sunray pleats?), and having not only a princess seamed bodice but also a waistline seam front and back should help greatly in getting a good fit. No fabric picked out for it as yet, but I would like to make it soon(ish).


Vogue 1192, another Anne Klein dress which I discovered after ordering that it had really bad reviews over on pattern review. So this might sit in the stash for a little while, until I feel up to another monumental fitting challenge!

Katherine H asked in the comments to the last post which Simplicity patterns I purchased from sewing patterns.com recently. Only happy to oblige!


Simplicity 2337, my first Project Runway pattern. I'm actually sewing a muslin for this at present and plan to sew the final version out of a charcoal grey herringbone polyester fabric.


Simplicity 2443, a Cynthia Rowley pattern that I bought mainly for the jacket because I don't have many casual, non corporate but still cute jackets to wear with jeans.


Simplicity 2253, which is a formal gown for which I have very little need for in my wardrobe but I thought that maybe I could make this knee length in a cotton for a smart casual summer dress. Possibly even contrasting colours for those diagonal strips around the torso if that didn't look too naff. But since it's a summery pattern it will have to wait a few months now.


Simplicity 2320 which is a children's Project Runway pattern that I'm planning to make a longer sleeved version in a fine wale corduroy for Anna.


Simplicity 2907, another kids pattern that I bought to make Anna a shirt dress but again will have to wait until next summer now. Helpfully the pattern ranges in size from 1/2 to 4 so I have plenty of years to get around to making it!


But the pattern gorging doesn't end there either! I recently bought two Ottobre magazines at the suggestion of several readers who assure me that the fit is better than the Big 4 catalogue. I bought these from Crafty Mamas, who are the Australian distributors, and they arrived very quickly in the mail so I can certainly recommend a purchase (or two) from them.


There are some really cool clothes for babies through toddlers to kids in these magazines, so I'm sure I'll get a lot of use out of them. In fact, I've already made a pair of jeans from one of these that just needs a snap or button inserted to be done.

And finally I happened to be in Kinokinuyas the other day when they were having a 20% off all craft books. So I purchased this lovely Japanese sewing book which I hope to start using soon:

Thank you so much to those who offered to purchase patterns in those amazing US sales and on post them to us long suffering Australians in an overpriced sewing pattern market, it is very kind of you but also very evil in an enabling kind of way! As you can see I definitely do not need, and should not buy, more patterns. For now. Maybe in the future I'll be in touch...

Summerflies (of the aptly named Sew Darn Tired) asked how Anna is sleeping - well I am happy to announce that since we made the appointment for the sleep specialist (which is next Friday) the little monkey has been sleeping great! It's like she knew we had reached our breaking point and so her work in destroying us was done. Seriously, in the last two weeks we've had several nights of her sleeping through until 6.30am, and the other nights she'll only wake once or twice but go back to sleep relatively quickly. Don't know how long this will last, and we will keep the sleep specialist appointment, but I'm enjoying it - especially as it means that during her waking hours she is such a more pleasant child to be around. Fingers crossed it lasts.